Welcome to one of the most magical times of the year! There is absolutely nothing quite like the feeling of decorating a holiday tree with ornaments you have made by hand. It brings a profound sense of coziness and nostalgia to any living space. This season, I am beyond thrilled to share my absolute favorite new pattern with you: the Whimsical Crochet Spiral Snowman Ornaments. These adorable little characters feature a classic, friendly amigurumi snowman head perched atop a very unique and playful corkscrew-shaped body. The design elegantly balances traditional holiday motifs with a fun, modern twist—literally! By using a simple but incredibly effective crochet technique of forcing multiple stitches into a single chain, you will watch the snowman’s “body” naturally curl into a perfect spiral right before your eyes.
These ornaments are designed with a gorgeous rustic holiday aesthetic in mind. Picture a cozy wooden table scattered with small frosted pinecones, warm natural lighting, and the soft bokeh of holiday string lights in the background. To match this inviting atmosphere, our snowmen are adorned with contrasting, textured accessories—a ribbed hat and a simple, cozy scarf—crocheted in muted, earthy tones like dusty rose. Paired with crisp white worsted weight yarn, the dusty rose creates a sophisticated, vintage-inspired palette that looks stunning on a deep green pine tree. Of course, you can easily customize the scarf and hat colors to match your own holiday decor, whether you prefer classic cherry red and forest green, or trendy icy blues and silvers.
Beyond just looking incredibly cute, these Spiral Snowman Ornaments are an absolute joy to crochet. They are wonderful stash-busters, requiring only small amounts of worsted weight acrylic yarn. The modular construction means you can easily batch-make the different parts: crochet all the heads one evening, work up a pile of curly spirals the next, and spend a cozy Sunday afternoon assembling your frosty friends. They make fantastic, heartfelt gifts for teachers, neighbors, and loved ones. You can even tie them onto wrapped packages as a special, handmade gift topper! This project is also a fantastic way to practice shaping, working in the round, and understanding how stitch density affects fabric drape and curling.
Pattern Info
- Skill Level: Intermediate. While the stitches themselves are straightforward, the assembly process—which involves managing a central stem, attaching a curled spiral, and securely fastening the accessories—requires a bit of patience and precision.
- Finished Size: Approximately 4.5 to 5 inches tall, depending on how tightly you wind the spiral during assembly.
- Gauge: Exact gauge is not critical for this amigurumi project. However, aim for stitches tight enough that no stuffing shows through the head. As a general guideline, 4 sc stitches = 1 inch using the recommended hook and yarn.
- Abbreviations Used (US Terms): sc = single crochet, inc = increase (2 sc in one stitch), dec = invisible decrease, ch = chain, sl st = slip stitch, rnd = round, st(s) = stitch(es), hdc = half double crochet, dc = double crochet, FLO = Front Loops Only.
Materials
- Yarn Weight: Medium (Category 4) Worsted Weight Acrylic Yarn.
- White Yarn: Approximately 50 yards (for the head, pom-pom, and spiral body).
- Dusty Rose Yarn: Approximately 30 yards (for the hat, scarf, base, and central stem).
- Orange Yarn: A scrap amount (roughly 1-2 yards) for the tiny carrot nose.
- Black Yarn: A scrap amount (for embroidering the smile).
- Hook Size: Size G / 4.0 mm crochet hook (or size needed to obtain a tight fabric).
- Notions: Fiberfill stuffing, one pair of 6mm safety eyes, a yarn needle for sewing parts together, stitch markers, and scissors.
- Optional Support: A small stiff wire or a toothpick to insert into the central stem to help the snowman stand perfectly upright.
Pattern Overview
This ornament is cleverly constructed in several distinct pieces that come together to form the whimsical spiral design. You will begin by crocheting the classic, spherical snowman head in continuous rounds, complete with safety eyes, a tiny crocheted carrot nose, and an embroidered smile. Next, you’ll whip up the cozy accessories: a dusty rose hat worked top-down featuring a folded Front-Loop-Only brim, topped with a miniature white pom-pom. The magic truly happens in the third phase when you crochet the spiral body. By working three double crochets into every chain stitch of a long foundation chain, the flat strip will aggressively ruffle and curl into a tight, bouncy corkscrew. Finally, you will crochet the essential structural components—a flat circular base, a central stem that acts as the snowman’s spine, and a simple half-double-crochet scarf. During assembly, the head is attached to the central stem, the spiral is wound around this stem, and everything is secured to the base, resulting in a delightfully springy ornament!
Step-by-Step Instructions
Grab your favorite hook, a warm cup of cocoa, and let’s start bringing these wonderful, whimsical snowmen to life!
Step 1: Crochet the Head and Face
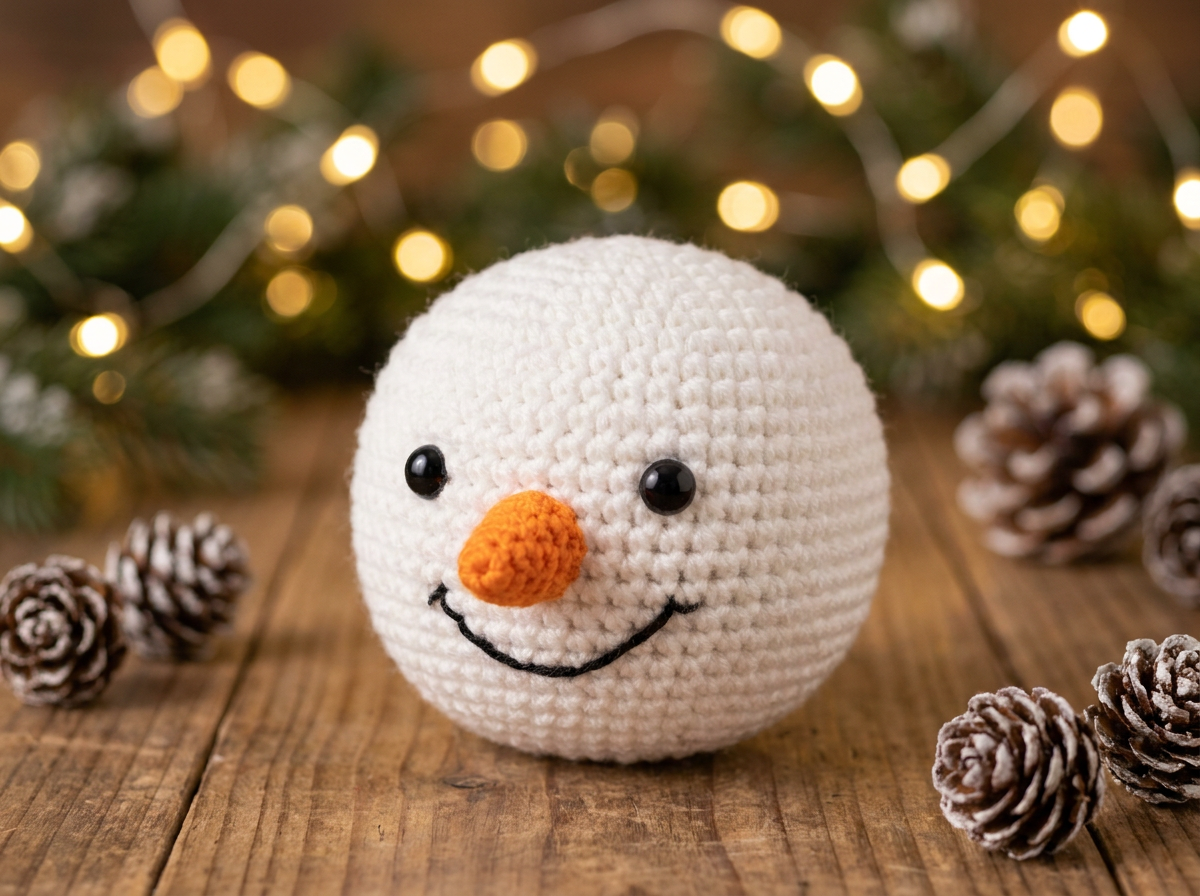
Make the head using white yarn. Rnd 1: 6 sc in a magic ring (6 sts). Rnd 2: 2 sc in each st around (12 sts). Rnd 3: [1 sc, inc] 6 times (18 sts). Rnd 4: [2 sc, inc] 6 times (24 sts). Rnd 5: [3 sc, inc] 6 times (30 sts). Rnds 6-10: sc in each st around (30 sts). Insert 6mm safety eyes between rnds 7 and 8, spaced about 4 stitches apart. Rnd 11: [3 sc, dec] 6 times (24 sts). Rnd 12: [2 sc, dec] 6 times (18 sts). Stuff the head firmly. Rnd 13: [1 sc, dec] 6 times (12 sts). Rnd 14: dec 6 times (6 sts). Fasten off and weave in the end. For the nose, use orange yarn: Ch 3, sl st in the 2nd ch from hook, sc in the last ch. Fasten off, leaving a tail, and sew the tiny cone between the eyes. Embroider a small smile below the nose using black yarn.
Step 2: Crochet the Hat and Pom-Pom
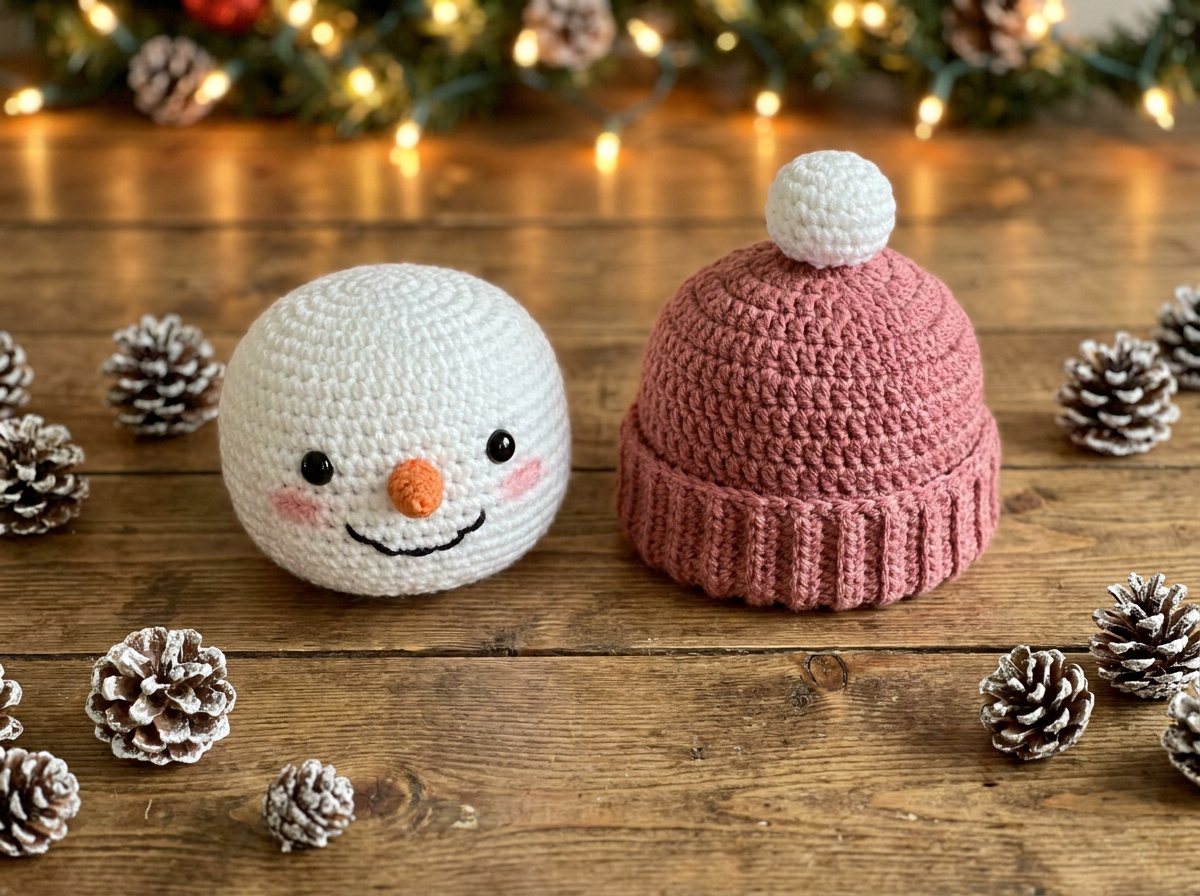
Make the hat using dusty rose yarn. Rnd 1: 6 sc in a magic ring (6 sts). Rnd 2: inc in each st around (12 sts). Rnd 3: [1 sc, inc] 6 times (18 sts). Rnd 4: [2 sc, inc] 6 times (24 sts). Rnds 5-8: hdc in each st around (24 sts). Rnd 9 (Brim): Working in the Front Loops Only, hdc in each st around (24 sts). Rnd 10: Working in both loops, hdc in each st around (24 sts). Fasten off and fold the brim up. For the pom-pom, use white yarn: 6 sc in a magic ring (6 sts), inc 6 times (12 sts), sc around (12 sts), dec 6 times (6 sts). Stuff slightly, close the hole, and sew it to the top center of the hat.
Step 3: Crochet the Spiral Body
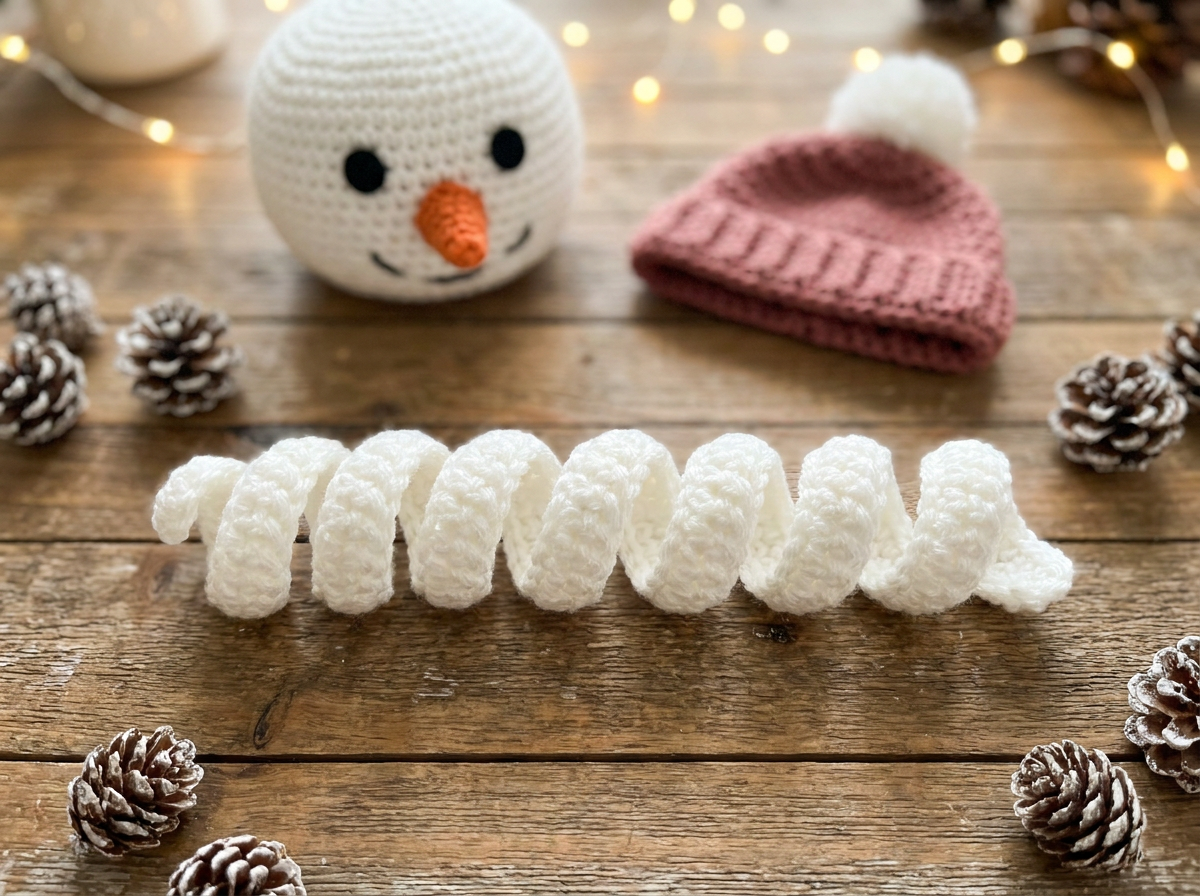
Make the spiral body using white yarn. This flat strip will naturally twist into a corkscrew shape by forcing multiple stitches into a single chain. Row 1: Ch 40. Row 2: Starting in the 3rd chain from the hook, work 3 dc into every chain stitch across the foundation chain (114 dc total). As you work, the fabric will ruffle and curl tightly into a spiral. When you reach the end, fasten off, leaving a long 12-inch tail for sewing later.
Step 4: Crochet the Base, Stem, and Scarf
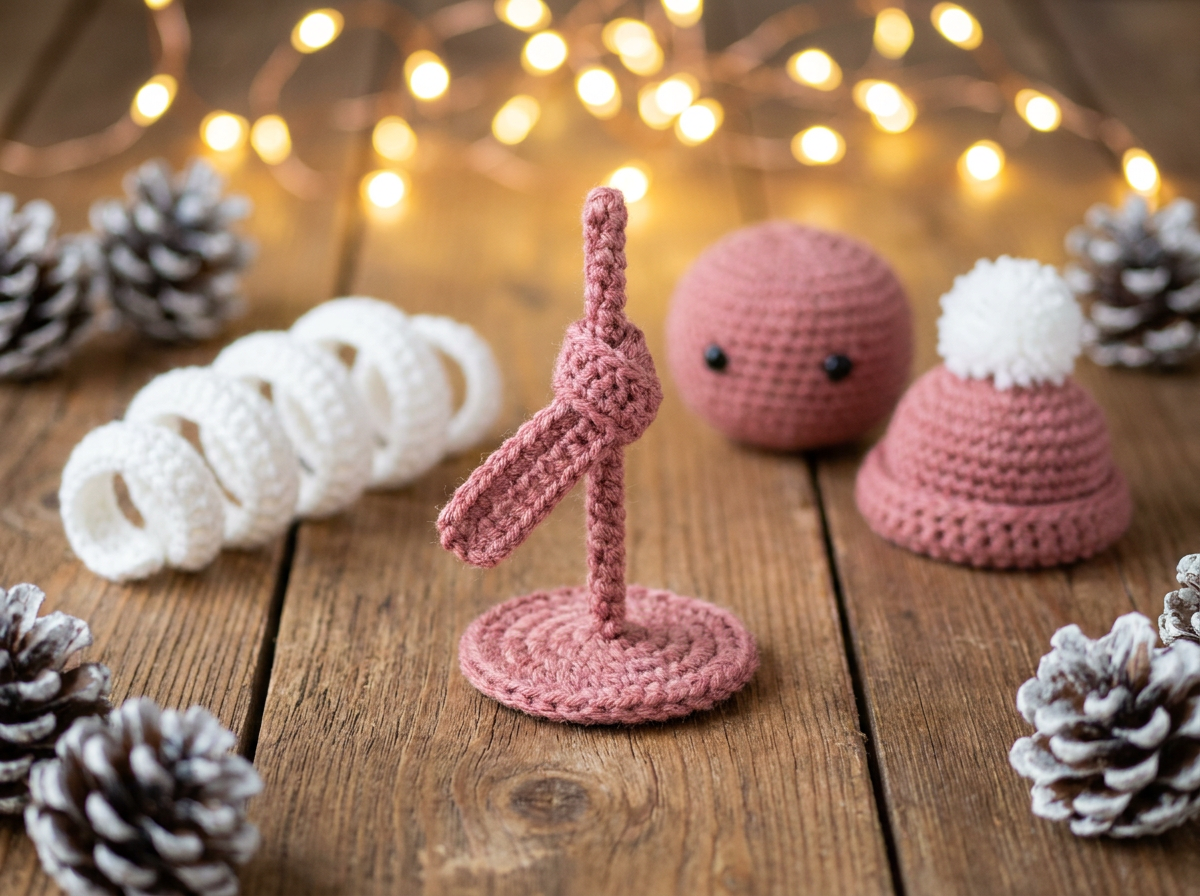
Make the base in dusty rose. Rnd 1: 6 sc in a magic ring (6 sts). Rnd 2: inc in each st (12 sts). Rnd 3: [1 sc, inc] 6 times (18 sts). Rnd 4: [2 sc, inc] 6 times (24 sts). Sl st to finish and fasten off. Make the central stem in dusty rose: Ch 15. Sc in the 2nd chain from hook and in each chain across (14 sts). Fasten off. (You may insert a stiff wire or toothpick into this cord during assembly to keep the snowman upright). Make the scarf in dusty rose: Ch 35, hdc in the 3rd chain from the hook and each chain across (33 sts). Fasten off and weave in the scarf ends.
Step 5: Assembly
Sew the hat onto the top of the head. Tie the scarf securely around the neck area. Sew one end of the dusty rose stem securely to the bottom center of the head, and sew the other end of the stem to the center of the dusty rose base. Take the white spiral body and sew its top edge just underneath the scarf. Wind the spiral smoothly downward around the central stem, allowing it to stretch out slightly, and sew the bottom edge of the spiral securely to the outer edge of the circular base. Finally, attach a loop of yarn to the top of the hat for hanging.
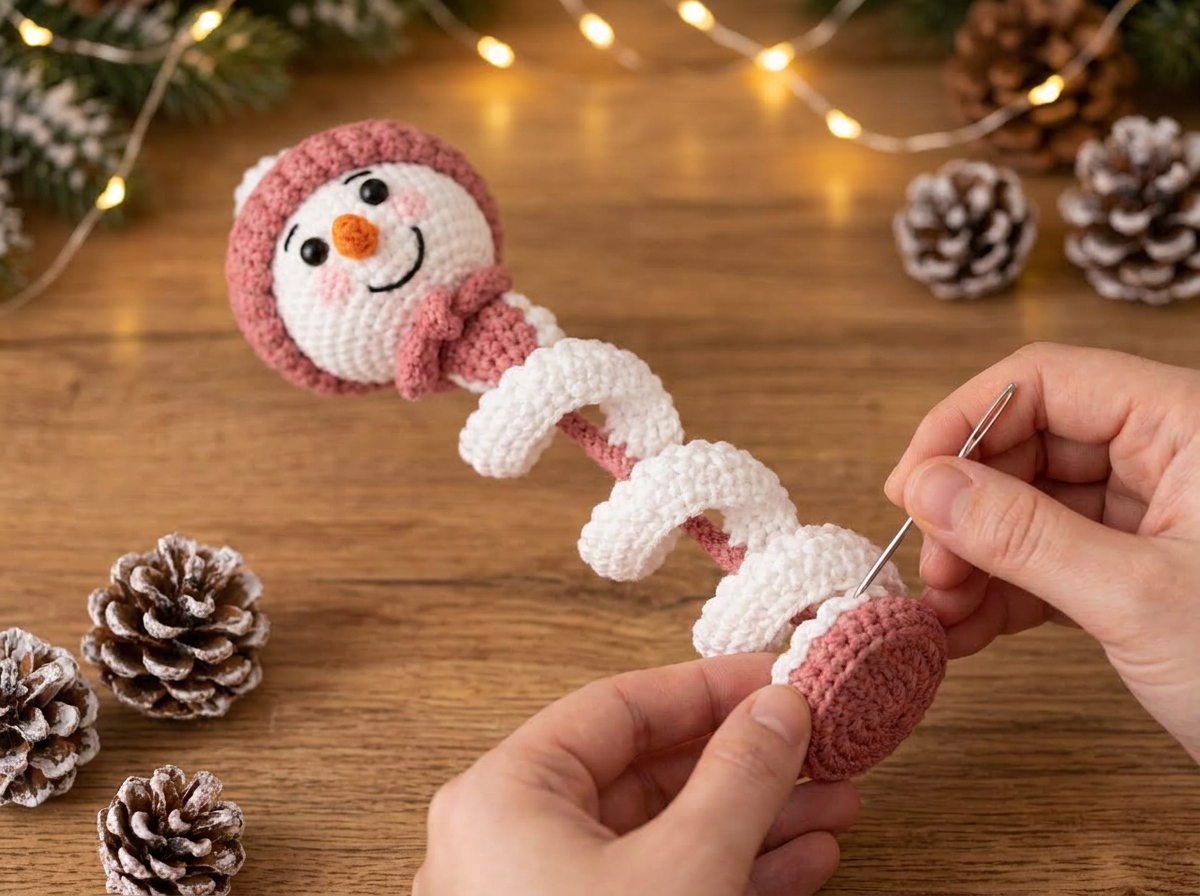
Congratulations on completing your incredibly charming Spiral Snowman Ornament! Taking the time to crochet, stuff, curl, and assemble all these small, detailed pieces truly pays off when you see that whimsical, bouncy snowman looking back at you. The way the thick white spiral beautifully wraps around the contrasting dusty rose stem gives this ornament a polished, boutique-quality finish that is sure to draw compliments from anyone who sees your holiday tree.
Now that your little frosty friend is finished, it’s time to show him off! These snowmen are wonderfully versatile. While they look absolutely stunning hanging from the branches of a Christmas tree, they also make fabulous freestanding decorations. Because of the flat, sturdy base and the optional wire or toothpick core you inserted into the stem, you can easily perch them on a mantle, nestle them into a holiday centerpiece, or line them up along a windowsill surrounded by frosted pinecones and fairy lights. If you are gifting them, consider using the snowman as a grand finale on top of a beautifully wrapped present—just slide the hanging loop through the gift ribbon for a two-in-one present that your loved ones will cherish for years to come.
I highly encourage you to experiment with this pattern! Try making an entire family of snowmen with different colored hats and scarves. Mustard yellow, sage green, and icy blue all look stunning alongside the classic white spiral. You can also easily adjust the height of your snowman by chaining more stitches for the central stem and the spiral body—just remember to maintain that ratio of three double crochets per chain to achieve the perfect corkscrew curl.
If you found any of the assembly steps tricky—especially wrapping the spiral around the central stem or getting the hat brim folded just right—please be sure to watch the full companion video tutorial. The video provides a clear, visual, step-by-step walkthrough of the entire process, including my best tips for securely sewing amigurumi parts together and hiding those pesky yarn tails. I would absolutely love to see how your beautiful snowmen turn out, so please share your photos with me on social media. Happy crocheting, and I wish you a wonderfully cozy and creative holiday season!