Welcome to Your New Favorite Holiday Project!
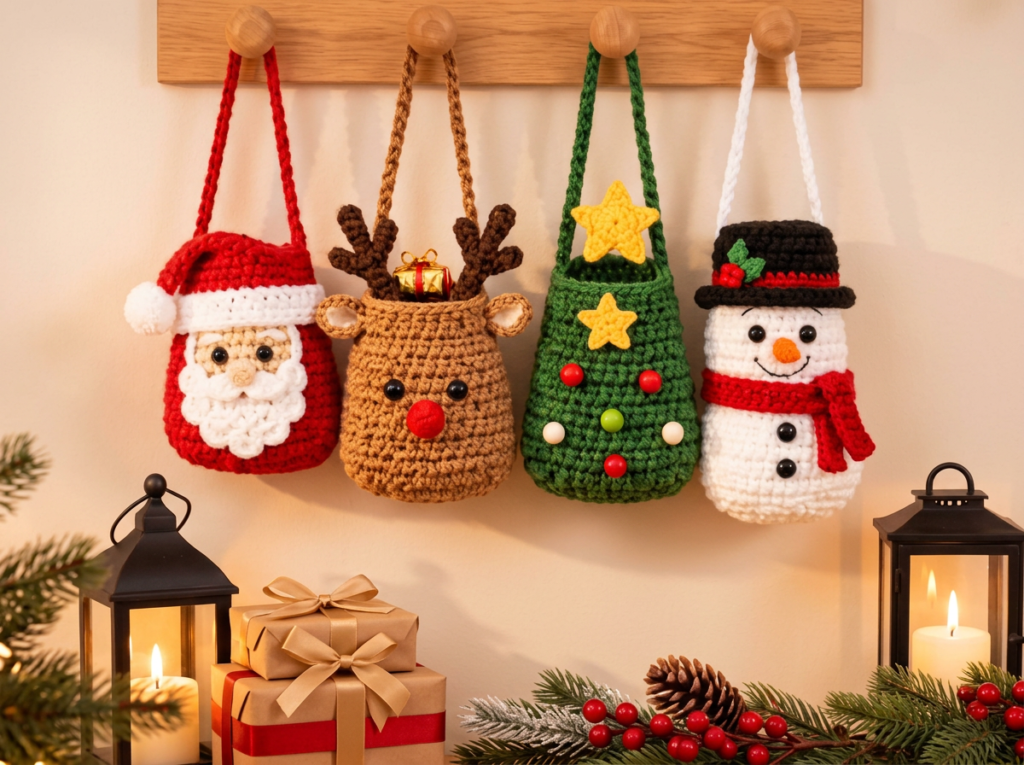
The holiday season is officially upon us, and there is nothing quite as magical as adding a handmade touch to your gift-giving and home décor. If you are looking for a quick, charming, and highly versatile project, you are going to absolutely fall in love with these Festive Friends Mini Gift Bags! This set features four adorable, classic Christmas characters: a jolly Santa, a sweet Reindeer, a decorated Christmas Tree, and a cheerful Snowman. Whether you need a clever way to present a gift card, a reusable little pouch for holiday treats and jewelry, or just some adorable handmade ornaments to hang on your tree or mantle, these drawstring-style pouches check every box.
Crocheted using bright, festive medium-weight yarn, these mini bags are incredibly satisfying to whip up. The bases are simple cylinders, which makes the repetitive rounds the perfect mindless crochet project for cozy evenings by the fire. The real magic happens when you bring them to life with fun appliqués and textures—from the fluffy shell stitches of Santa’s beard to the tiny beads on the Christmas tree! Not only are they an excellent stash-buster for those partial skeins of yarn left over from bigger winter projects, but they also teach some fantastic basic shaping and appliqué attachment skills. You will love how quickly they work up, making them the ultimate last-minute handmade gift for teachers, coworkers, and neighbors!
Pattern Info
- Skill Level: Easy / Advanced Beginner (Requires knowledge of crocheting in the round, simple color changes, and basic sewing for appliqués.)
- Finished Size: Approximately 3.5 inches tall by 2.5 inches wide, not including straps or antlers.
- Gauge: 5 sc and 5 rounds = 1 inch (using a 4.0mm hook).
- Abbreviations Used (US Terms): sc = single crochet, inc = increase (2 sc in one st), dc = double crochet, ch = chain, sl st = slip stitch, rnd = round, st(s) = stitch(es).
Materials
- Yarn: Medium weight (Category 4 / Worsted) acrylic or cotton yarn. You will need approximately 25-30 yards of the primary color for each bag. Colors needed: Red (Santa body/scarf), White (Snowman body/Santa beard), Light Brown (Reindeer body), Green (Tree body), Beige (Santa face/Reindeer ears), Black (Snowman hat), Dark Brown (Antlers), and Yellow (Stars).
- Hook: 4.0mm (Size G) crochet hook.
- Notions: 6mm safety eyes (2 pairs), black embroidery floss for smiles, small colored beads for the Tree baubles, tapestry/yarn needle for sewing, and stitch markers to keep track of continuous rounds.
Pattern Overview
The construction of these Festive Friends Mini Gift Bags is designed to be streamlined and fun. First, we will crochet the main pouch bodies for all four designs. They all follow the exact same base pattern—a flat circular bottom that builds up into a simple cylinder using continuous rounds of single crochet. Once your bases are complete (incorporating the necessary color changes for the Snowman’s hat), we’ll switch gears to crochet the adorable embellishments, including Santa’s beard, the reindeer’s antlers, and the yellow stars. Next, we will prep the faces by inserting safety eyes and embroidering the smiles. Finally, we will assemble our characters by securely sewing on the appliqués and creating the matching slip-stitched hanging straps. It’s an assembly-line friendly process that makes making all four a breeze!
Step-by-Step Instructions
Grab your hook, your most festive yarns, and a warm cup of cocoa—let’s bring these mini gift bags to life!
Step 1: Crocheting the Main Pouch Bodies
Start by making the main pouch bodies for all four designs. Using the primary color (Red for Santa, Light Brown for Reindeer, Green for Tree, White for Snowman), make a magic ring. Rnd 1: 6 sc in ring (6). Rnd 2: inc in each st around (12). Rnd 3: [1 sc, inc] 6 times (18). Rnd 4: [2 sc, inc] 6 times (24). Rnd 5: [3 sc, inc] 6 times (30). Rnds 6-18: sc in each st around (30). Fasten off and weave in ends. (Note: For Santa, switch to red after the white base; for Snowman, switch to black for the top 5 rounds to create the hat.)
Step 2: Making the Embellishments (Beard, Antlers, Star)
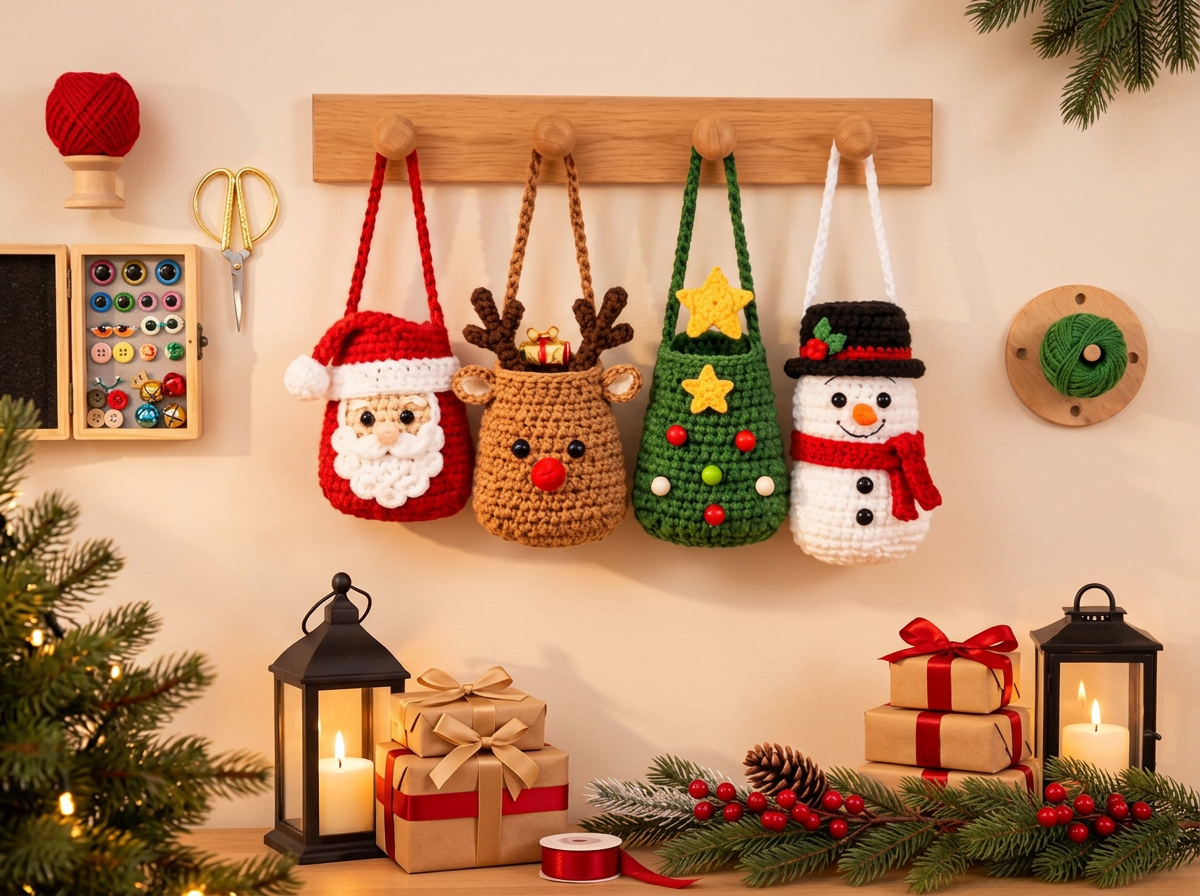
Crochet the various attachments. Santa Face/Beard: With beige, ch 6, sc in 2nd ch and across, turn. Work 3 rows of sc. Change to white; work shell stitches (5 dc in same st) along the curved bottom edge to form the beard. Reindeer Antlers (make 2): With dark brown, ch 8, sl st in 2nd ch and next 2 chs (branch), ch 4, sl st back down, sl st down main chain. Reindeer Ears: Beige magic ring with 4 sc, folded in half. Red Nose: 6 sc in magic ring, sl st closed. Stars (make 2): Yellow magic ring, [ch 3, sl st in 2nd ch, sc in next, sl st in ring] 5 times. Snowman Scarf: Red ch 30, sc across.
Step 3: Adding Faces and Details
Before attaching the appliqués to the bags, add the facial features. Insert 6mm safety eyes into the Santa face and the Reindeer body (about round 12). Using black embroidery floss, stitch a small smile on the Santa face and Snowman body. Sew small colored beads onto the green Tree pouch to act as baubles. Ensure all backs of safety eyes are securely snapped into place on the inside of the work.
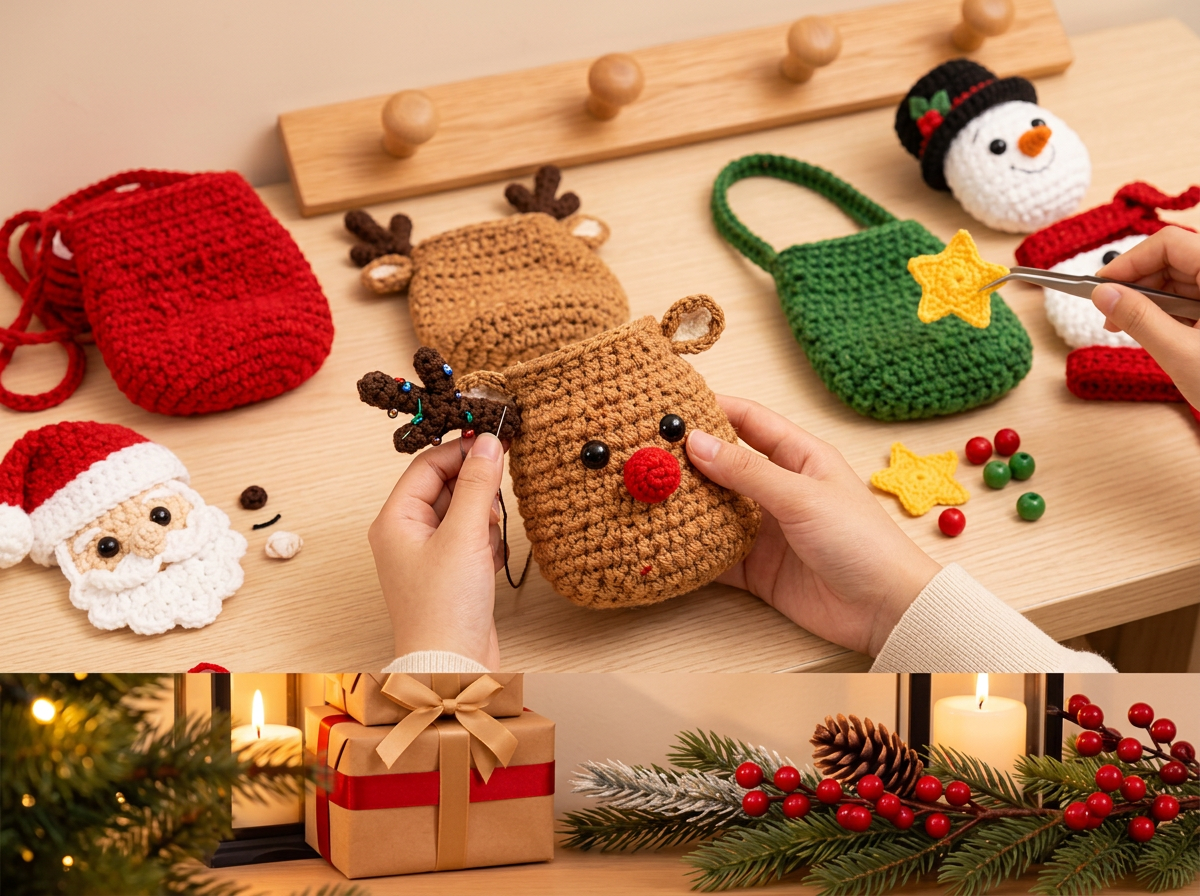
Step 4: Assembling the Bags
Now, sew the prepared appliqués onto their respective pouch bodies using a tapestry needle and matching yarn. Pin the Santa face to the front of the red pouch and whipstitch around the edges. Sew the antlers and ears to the top edge of the Reindeer pouch, and place the red nose centrally below the eyes. Wrap the red scarf around the Snowman's 'neck' (where the color changes to black) and tack it down. Sew the yellow stars to the top edge of the Tree pouch.
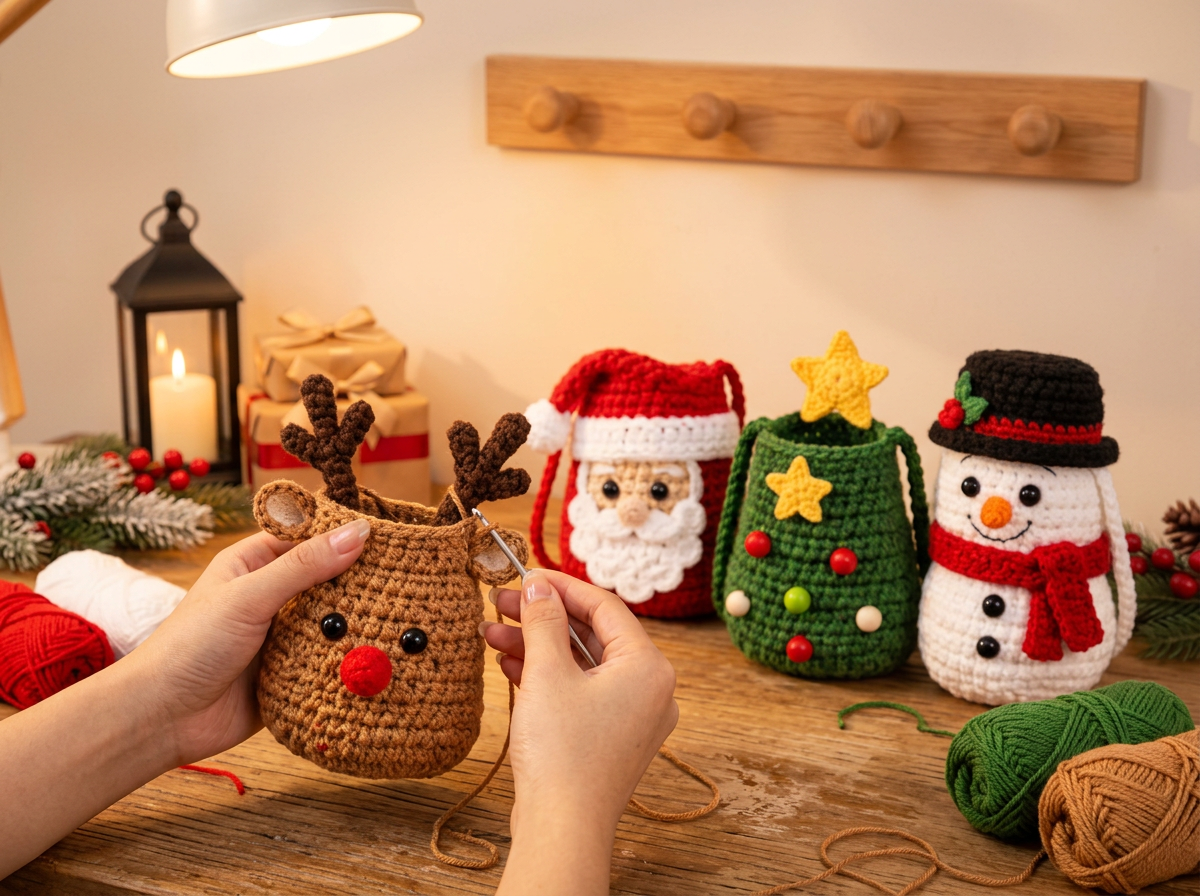
Step 5: Creating and Attaching Straps
To finish, make the hanging straps for each bag. With the matching body color yarn (Red, Light Brown, Green, White), chain 35. To make it slightly thicker, slip stitch in the 2nd ch from hook and each ch across. Fasten off, leaving a long tail. Sew the ends of the strap securely to the inside top edge of the bag, placing them exactly opposite each other. Weave in all remaining ends inside the pouch. Your festive mini gift bags are ready to hang!
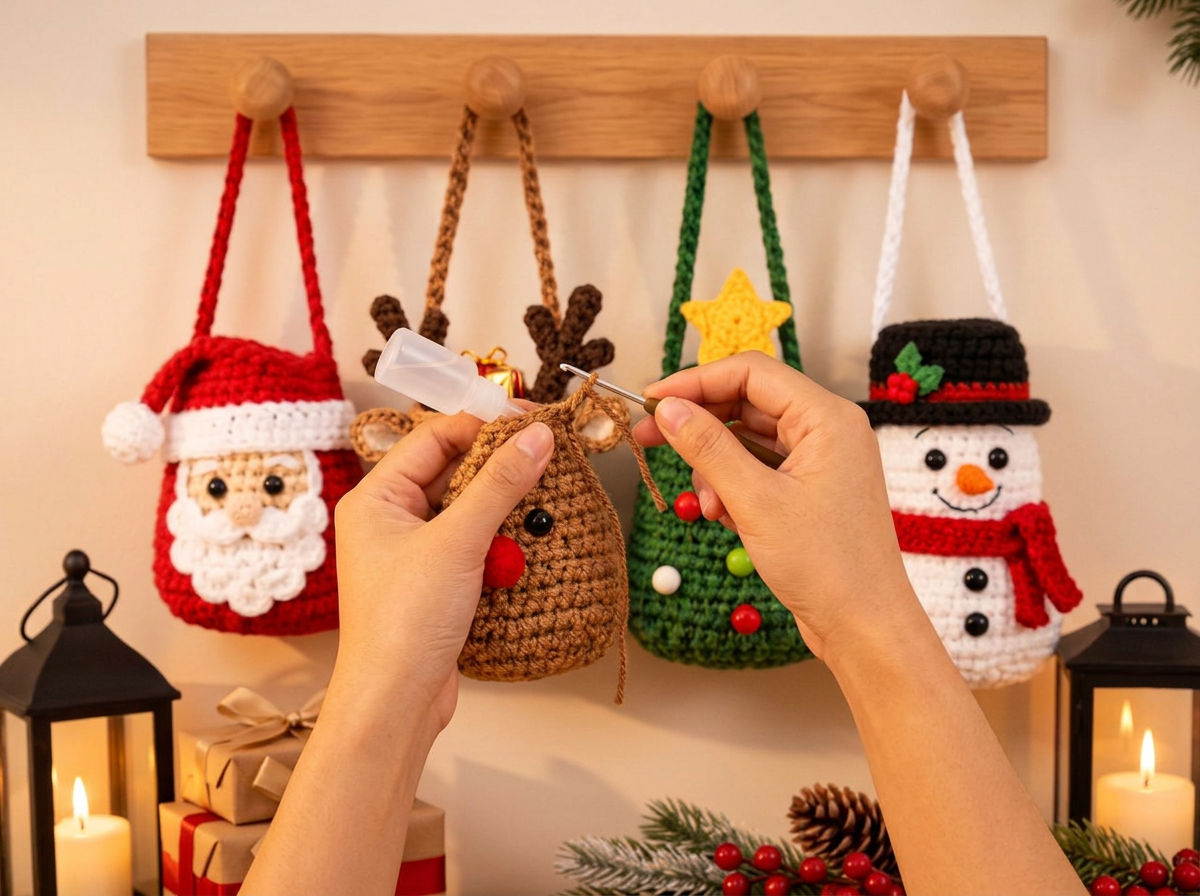
Finishing Touches and Styling Your Mini Bags
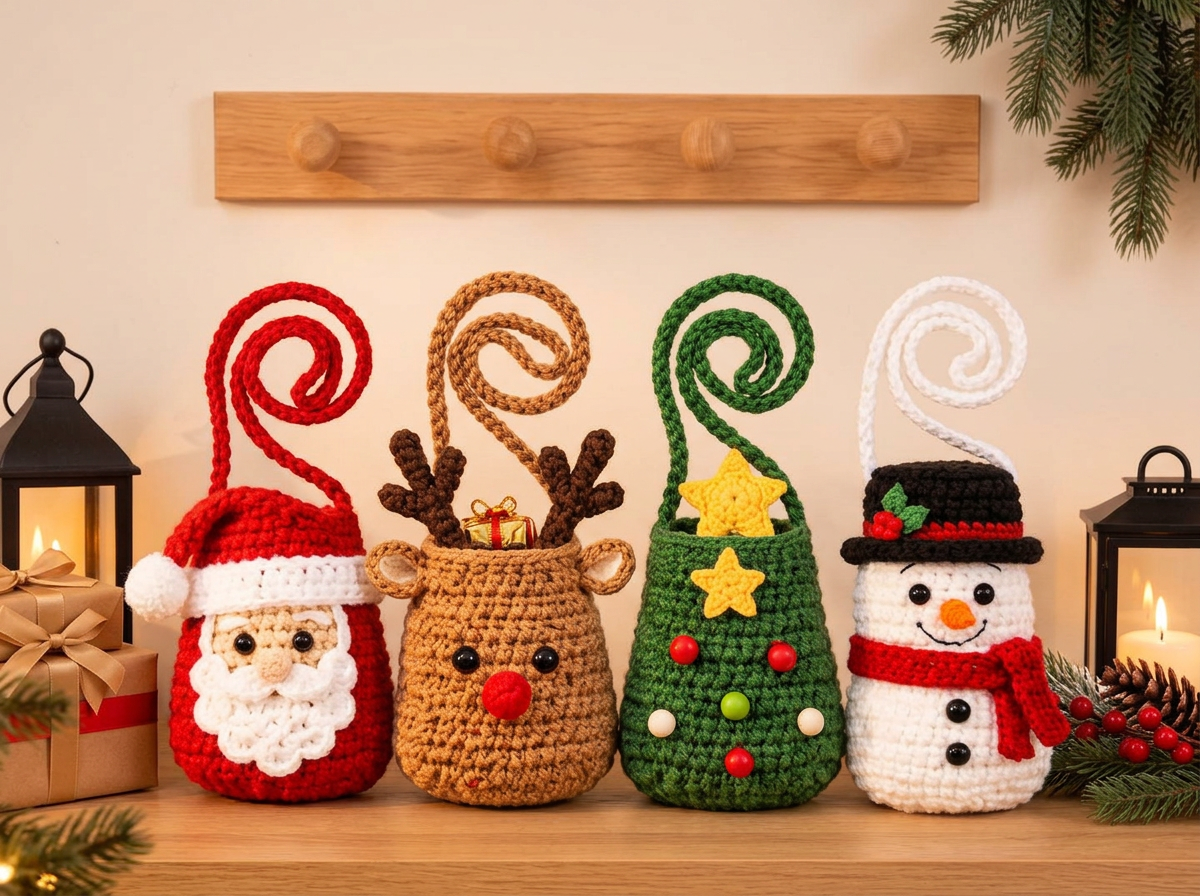
Congratulations on completing your incredibly cute set of Festive Friends Mini Gift Bags! Seeing all four of these characters lined up together—Santa, the Reindeer, the Christmas Tree, and the Snowman—truly brings out the joy of the season. Once you’ve woven in your final ends and adjusted your straps, these little pouches are ready to spread some holiday cheer.
There are so many wonderful ways to use these bags! One of my favorite traditions is using them as eco-friendly, reusable wrapping for small items. They are the absolute perfect size for sliding in a gift card, a pair of earrings, or a handful of chocolate truffles. You can give them individually to teachers, postal workers, or friends as a sweet token of appreciation. If you want to keep them for your own home décor, try hanging them from a wooden peg rack in your entryway, nestling them into the branches of your Christmas tree as functional ornaments, or stringing them along a piece of twine to create an interactive advent garland for your family!
You can also easily customize this pattern to match your own unique holiday aesthetic. Try making the reindeer in a snowy white for a magical woodland feel, or crochet the bags in pastel pinks, blues, and mint greens for a retro mid-century modern holiday vibe. The possibilities are truly endless once you have the base pattern mastered!
I highly recommend watching the companion video tutorial linked above if you need any extra help with the appliqué assembly, perfectly placing those safety eyes, or getting that neat slip-stitched strap exactly right. The video provides a complete visual walkthrough so you can crochet right alongside me. I would absolutely love to see how your mini gift bags turn out, so please be sure to snap a photo and tag me on social media! Happy holiday crocheting!