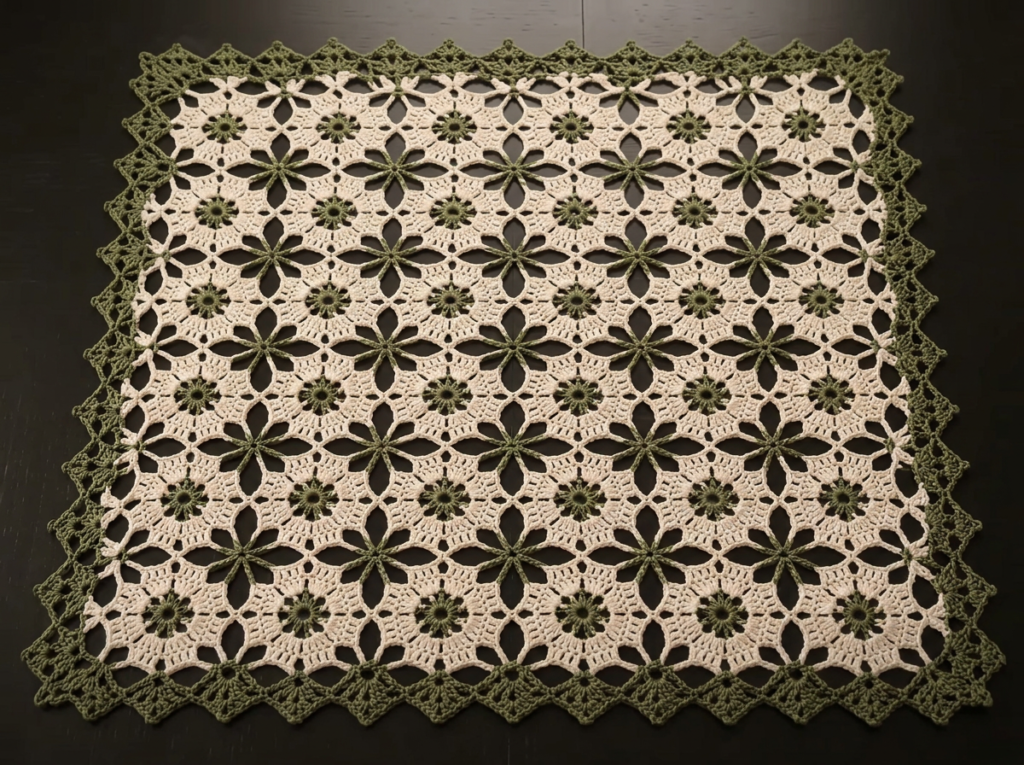
There is something undeniably magical about draping a freshly finished, hand-crafted lace piece across a dining table, especially when the light hits it just right. If you have been searching for a sophisticated home decor project that combines delicate openwork with rich, earthy tones, you are about to fall in love with this Lacy Olive and Cream Crochet Table Runner. Designed to lay beautifully on a dark wooden table, this runner features an elegant, airy lattice of creamy off-white floral petals anchored by charming, muted earthy olive green centers. As natural light filters through your windows, the openwork crochet stitches cast the most stunning, moody shadows across the wood, transforming your everyday dining area into a curated, artisanal space.
This project is perfect for crocheters looking to elevate their home for the upcoming season, or those wanting to stitch a truly heirloom-quality wedding or housewarming gift. While lace might look incredibly complex, this runner is built motif by motif. The magic of this pattern lies in the join-as-you-go technique, which means you will watch your runner grow organically without the dreaded task of sewing dozens of intricate pieces together at the very end. By the time you complete your final border, you will have a lightweight, beautifully draped masterpiece that feels wonderfully crisp and textured to the touch.
Pattern Info
- Skill Level: Intermediate. You should be comfortable with basic stitches, working in the round, making magic rings, and executing a join-as-you-go technique. Creating picot stitches and working into chain spaces are also key components of this design.
- Finished Size: Approximately 15 inches wide by 58 inches long after blocking. The runner consists of a 2×8 grid of main floral motifs.
- Gauge: One completed Main Floral Motif (Rnds 1-3) measures approximately 7 inches across. Gauge is not strictly critical, but consistency across your motifs is essential to ensure the runner lays perfectly flat.
- Abbreviations Used (US Terms): ch = chain, sl st = slip stitch, sc = single crochet, hdc = half double crochet, dc = double crochet, rnd = round, st(s) = stitch(es), sp = space, beg = beginning. (Note: The picot stitch is explained directly within the border step).
Materials
- Yarn: Lightweight (Category 3 / DK or Category 2 / Sport weight) 100% mercerized cotton yarn. Cotton is highly recommended for this project as it provides the crisp stitch definition and structured drape necessary for lacework. You will need approximately 400 yards of Muted Earthy Olive Green and 600 yards of Creamy Off-White.
- Hook: 4.0 mm (US Size G/6) crochet hook (or size needed to obtain gauge).
- Notions: A sharp pair of scissors, a yarn needle for weaving in ends, a few stitch markers (helpful for tracking border corners), and essential blocking supplies (blocking mats, rust-proof T-pins, and a spray bottle or garment steamer). Blocking is not optional for this project—it is what opens up the lace!
Pattern Overview
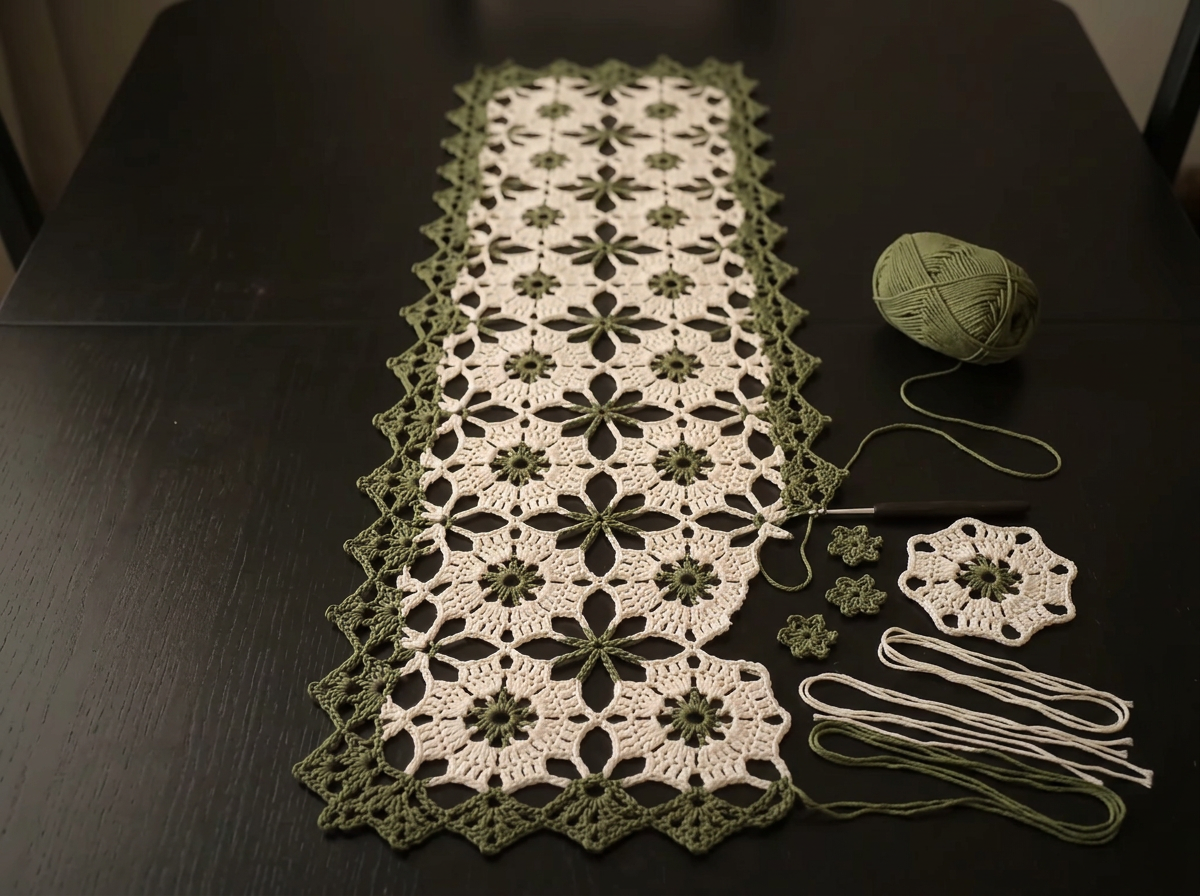
The construction of this table runner is both methodical and satisfying. We will build the piece starting with 16 Main Floral Motifs, arranged in a long 2×8 rectangular grid. You will crochet the very first motif entirely on its own, utilizing a two-color approach: a solid olive green center followed by creamy off-white cluster petals and delicate chain loops. From the second motif onward, you will utilize a simple join-as-you-go method during the final round, connecting the chain loops of adjacent motifs to build your grid seamlessly. Once the primary lattice is constructed, you will notice charming little diamond-shaped gaps where four main motifs intersect. We will go back in with our olive green yarn to crochet 7 small, solid Filler Motifs, anchoring them directly into the surrounding chain loops to secure and stabilize the fabric. Finally, the raw, wavy edge of the runner is framed with a two-round border: a structural foundation round to straighten the edges, followed by a stunning scalloped border featuring textured picot points.
Step-by-Step Instructions
Gather your cotton yarn, prep your hook, and let’s start crocheting this gorgeous table runner together!
Step 1: Main Floral Motif
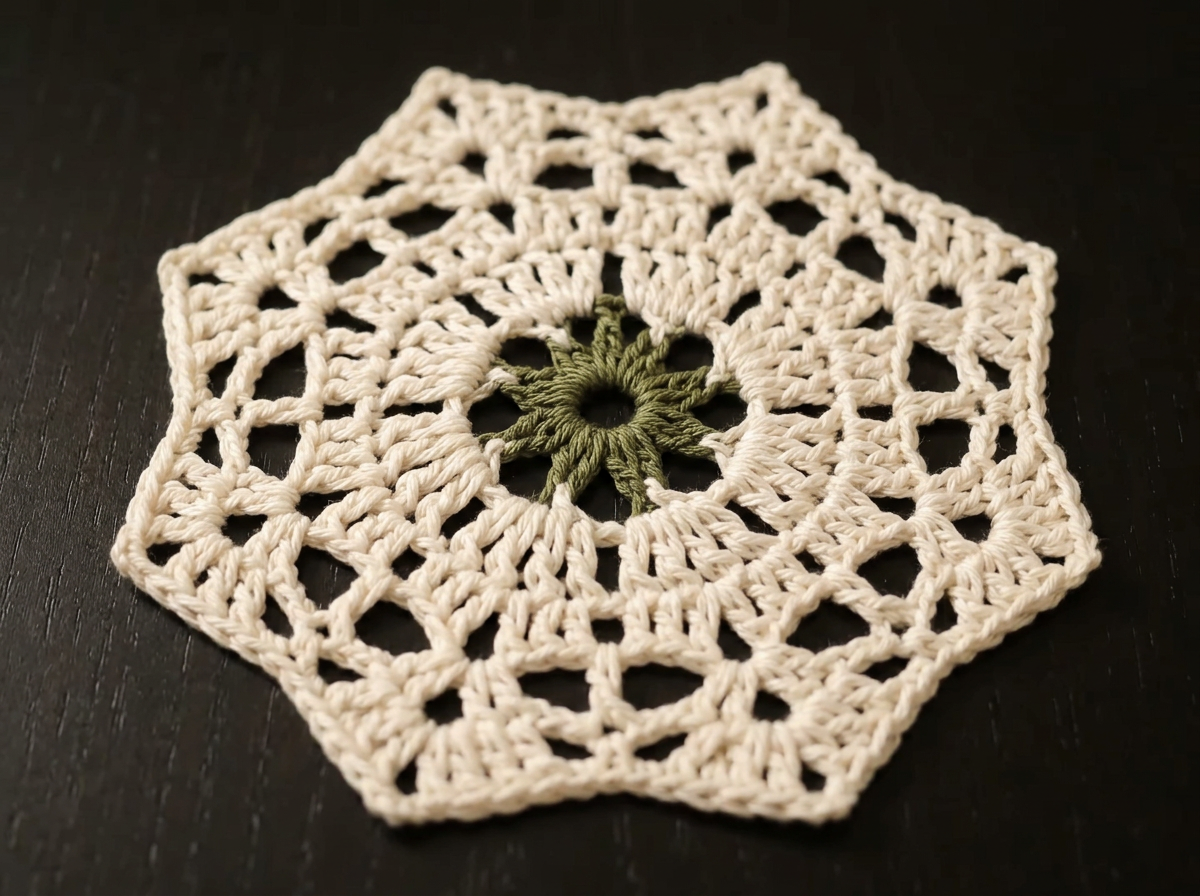
We begin by making the first Main Floral Motif. With olive green yarn, ch 4 and sl st to form a ring. Rnd 1: Ch 1, 8 sc into the ring, sl st to the first sc (8 sc). Fasten off the green yarn. Rnd 2: Join the creamy off-white yarn in any sc. Ch 3 (counts as 1 dc), 2 dc in same st, ch 2. *3 dc in next sc, ch 2* 7 times. Sl st to top of beg ch-3 (8 3-dc clusters, 8 ch-2 spaces). Rnd 3: Sl st into the next 2 dc and into the ch-2 sp. Ch 1, *sc in ch-2 sp, ch 5*. Repeat from * around, sl st to first sc (8 sc, 8 ch-5 loops). Fasten off and weave in ends.
Step 2: Joining the Main Motifs
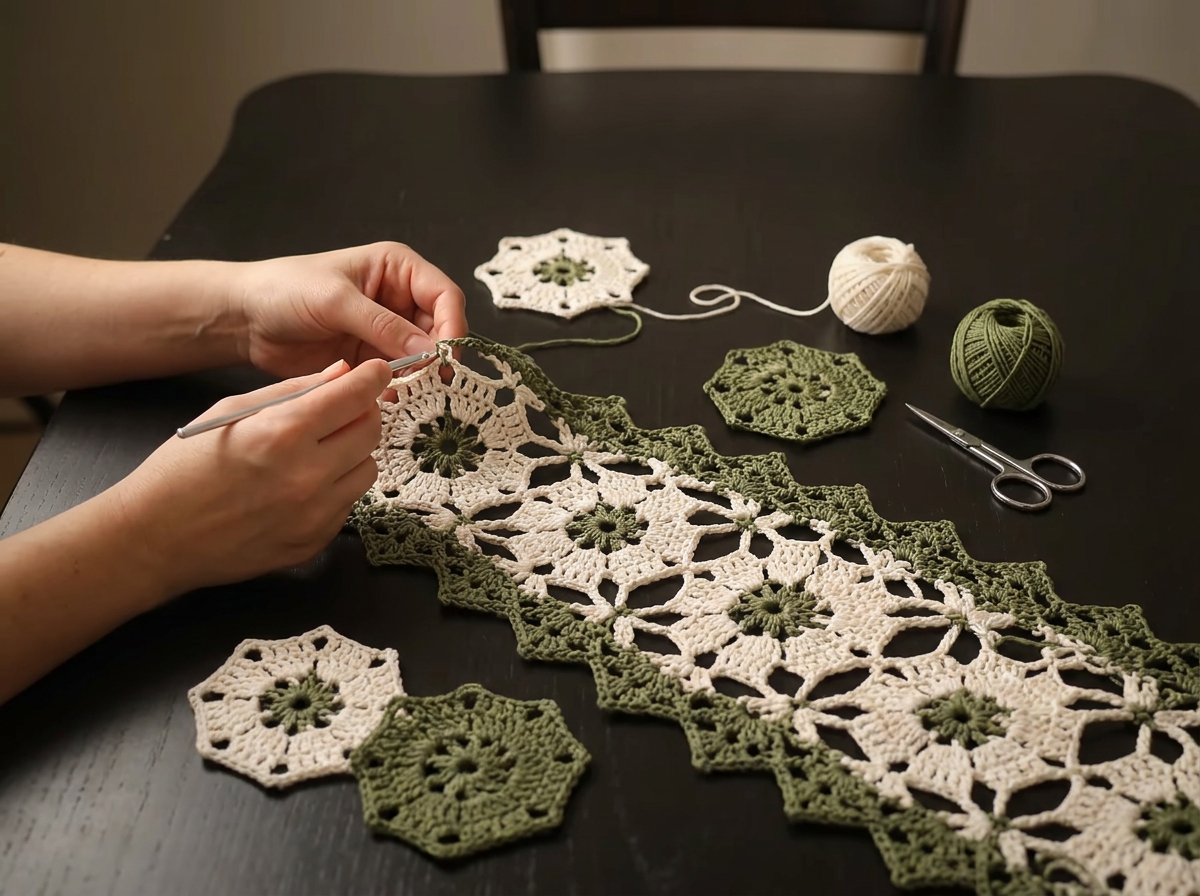
Crochet 15 more Main Floral Motifs, but join them into a 2×8 rectangular grid as you work Rnd 3 of each new motif. To join: instead of a regular ch-5 loop, ch 2, sl st into the corresponding ch-5 loop of the adjacent completed motif, ch 2, and sc back into the current motif's ch-2 space. Join the adjacent sides of each octagon until you have a complete 2×8 grid of 16 motifs.
Step 3: Adding the Filler Motifs
There are 7 diamond-shaped gaps where four main motifs meet. We will fill these with small green Filler Motifs. With olive green yarn, make a magic ring. *Ch 3, sl st into the unjoined corner ch-5 loop of one of the surrounding main motifs, ch 3, sc into the magic ring* 4 times, working in a circle to anchor to all 4 surrounding motifs. Sl st to the first sc, pull the magic ring tight, and fasten off. Repeat this for all 7 intersections.
Step 4: Border Foundation Round
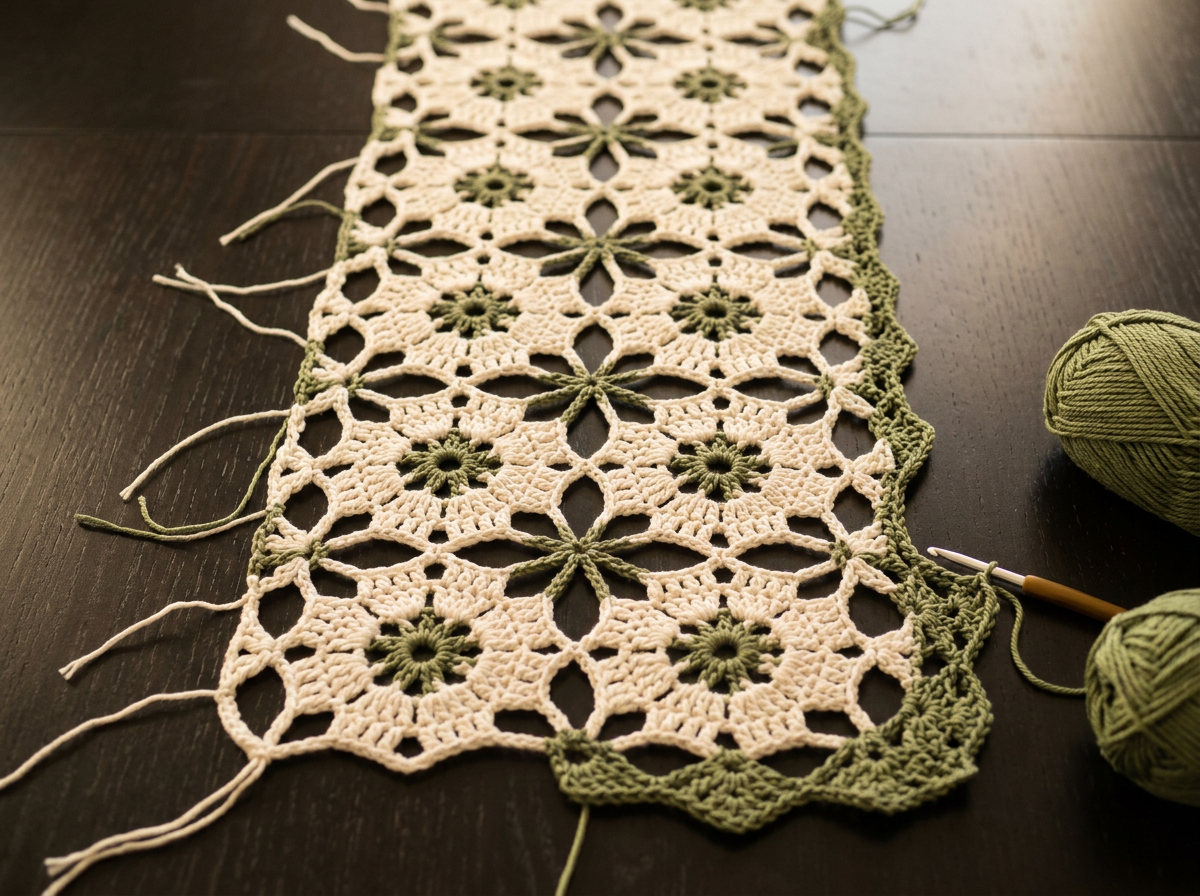
To prepare the wavy edge of the runner for the final border, we need a foundation round. Join olive green yarn to any outer ch-5 loop. Rnd 1: *Sc in the ch-5 loop, ch 4, dc into the slip-stitch join between two main motifs, ch 4* around the entire perimeter to create a straight edge. In the 4 extreme corner loops of the rectangle, work (sc, ch 3, sc) to turn the corner. Sl st to the first sc to close the round.
Step 5: Scalloped Border Final Round
Now we add the pointed scallops. Rnd 2: Ch 1. *In the next ch-4 space work (2 sc, hdc, dc, ch 3 and sl st into 3rd ch from hook for a picot, dc, hdc, 2 sc)* to form a pointed scallop. Repeat from * in every ch-4 space around the perimeter. In the 4 corner ch-3 spaces, work (3 dc, picot, 3 dc). Sl st to the first sc and fasten off. Weave in all remaining ends and block the table runner flat to open up the lacework.
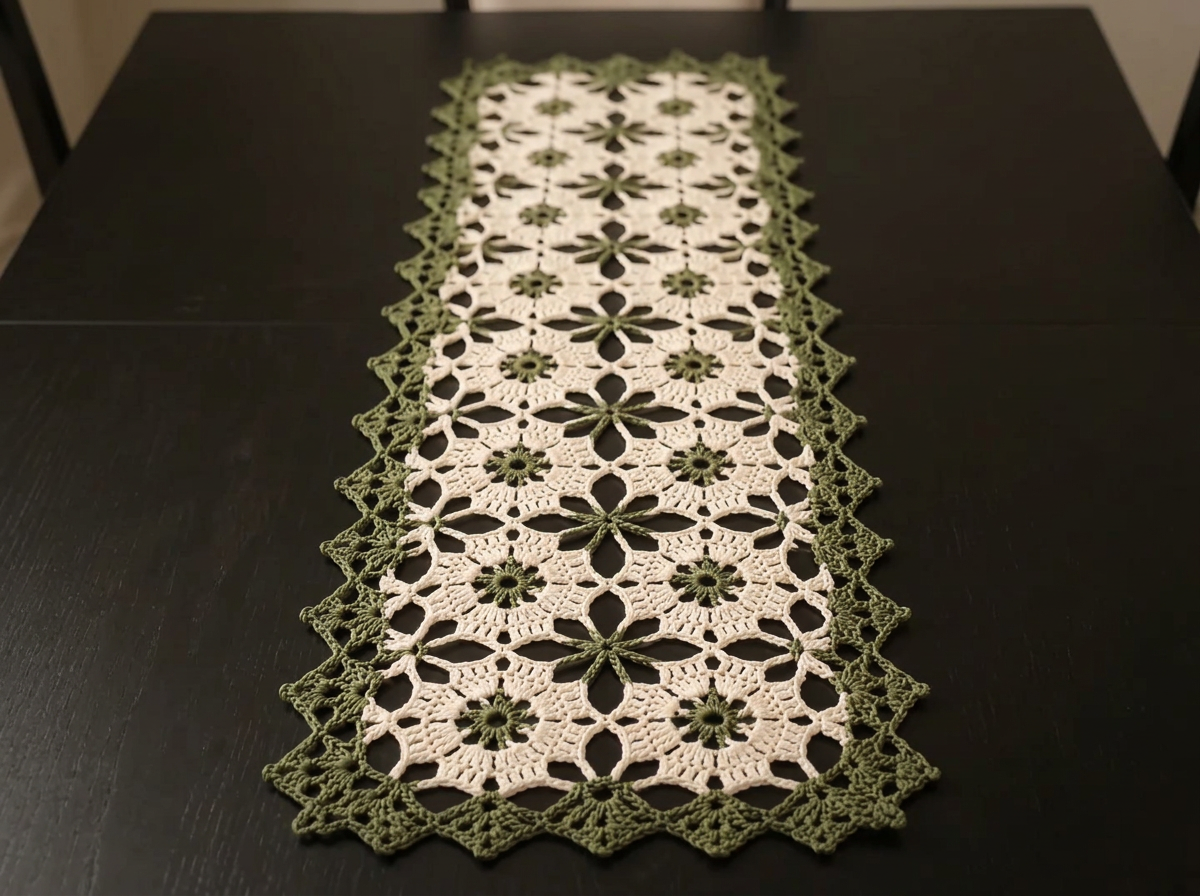
Congratulations on completing your stunning Lacy Olive and Cream Crochet Table Runner! The intricate details, from the delicate join-as-you-go floral motifs to those beautiful picot-edged scallops, truly make this a breathtaking showpiece for any room. Before you rush to display it, please take the time to properly block your runner. Pinning it out taut on blocking mats and giving it a gentle steam or water spritz will work miracles. Blocking relaxes the cotton fibers, forces those chain-5 loops to open up into distinct geometric shapes, and ensures that your picot points lay perfectly flat and crisp.
Once dry, this runner begs to be styled. It looks incredibly striking resting flat on a dark wooden dining table, where the deep tones of the wood create a dramatic background that highlights every single loop and stitch of your creamy off-white and olive yarn. For a softer, more layered aesthetic, try placing it over a solid, light-colored fabric tablecloth to add instant vintage charm and texture to your tablescape. It also makes an unforgettable handmade gift for holidays, anniversaries, or special dinner parties.
If you prefer to see these techniques in action—especially the join-as-you-go method and the process of anchoring those diamond filler motifs—be sure to check out the companion video tutorial. The video provides a detailed visual walkthrough of every single step, ensuring your tension and joins are flawless. I would absolutely love to see how your table runner turned out and how you have styled it in your own home. Please share your finished project photos with me on social media and tag me so I can admire your beautiful crochet lacework. Happy stitching, and enjoy your gorgeous new table setting!