

Welcome to a truly breathtaking addition to your home decor: the Ruffled Rose Centerpiece Doily. If you have been searching for a striking, dimensional piece to elevate your dining table, coffee table, or vanity, this intricate crochet project is exactly what you need. Combining the timeless elegance of classic doilies with stunning 3D textures, this ruffled rose centerpiece doily brings a modern yet romantic touch to any room. Beautifully crafted in a fine, smooth acrylic-cotton blend yarn, the finished piece boasts a delightfully crisp stitch definition and a lovely drape that sits perfectly flat on your table.
This pattern features a captivating color palette: a muted, dusty pink for the central floral motif and delicate edgings, a vibrant leafy green for the foliage accents, and a pure bright white for the magnificent tiered ruffles. Making this centerpiece is a wonderful way to practice working in front and back loops (FLO and BLO) to create layered, three-dimensional effects. It makes an unforgettable Mother’s Day gift, a gorgeous housewarming present, or a beautiful springtime refresh for your own living space. While it looks incredibly complex with its four distinct ruffle tiers and delicate scalloped borders, the construction is surprisingly logical and enjoyable once you understand the layer-building technique.
Pattern Info
- Skill Level: Intermediate. This pattern requires comfort with working in front and back loops, crocheting overlapping petals, and creating puff stitches.
- Finished Size: Approximately 10 to 12 inches in diameter, depending on your tension.
- Gauge: First 3 rounds of the rose motif = approximately 2 inches across.
- Abbreviations Used (US Terms): ch = chain, sc = single crochet, dc = double crochet, sl st = slip stitch, st(s) = stitch(es), rnd = round, FLO = front loops only, BLO = back loops only, puff st = puff stitch.
Materials
- Yarn: Fine/Sport Weight (Category 2) smooth acrylic-cotton blend yarn. You will need approximately 75 yards of Dusty Pink, 20 yards of Leafy Green, and 150 yards of Bright White.
- Hook: 3.0 mm crochet hook (or size needed to obtain gauge).
- Notions: Yarn needle for weaving in ends, and stitch markers to keep track of the start of your rounds.
Pattern Overview
The construction of this ruffled rose centerpiece doily is an exciting journey through layers and textures. We begin at the very center by crocheting a beautiful 3D rose using dusty pink yarn. By strategically utilizing front and back loops, you will build three overlapping tiers of petals radiating from a single magic ring. Next, we introduce the vibrant green yarn, working behind the rose to create a ring of pointed, picot-trimmed leaf accents. After the floral center is complete, we switch to white yarn to establish the doily’s base. The magic of the four ruffled tiers happens by crocheting flat increase rounds in the back loops, leaving the front loops completely exposed. We then return to those exposed front loops to crochet glorious, textured puff-stitch ruffles. Finally, the piece is tied beautifully together by adding a delicate, dusty pink scalloped edging to the outer rim of every single white ruffle tier.
Step-by-Step Instructions
Grab your hook and your dusty pink yarn, and let’s start blooming!
Step 1: Crochet the 3D Central Rose
With dusty pink yarn, create a magic ring. Rnd 1: Ch 1, 6 sc in ring, sl st to first sc (6 sts). Rnd 2: Working in front loops only (FLO), (ch 3, 2 dc, ch 3, sl st) in each st around to create 6 small overlapping petals. Rnd 3: Working behind the petals into the remaining back loops of Rnd 1, (ch 4, skip 1, sc in next) 3 times to make 3 ch-4 spaces. Rnd 4: In each ch-4 space work (sl st, ch 2, 4 dc, ch 2, sl st) for 3 larger petals. Rnd 5: Anchor ch-5 loops behind Rnd 4 petals, and in each ch-loop work (sl st, ch 2, 6 dc, ch 2, sl st) to form the final petal tier. Fasten off pink.
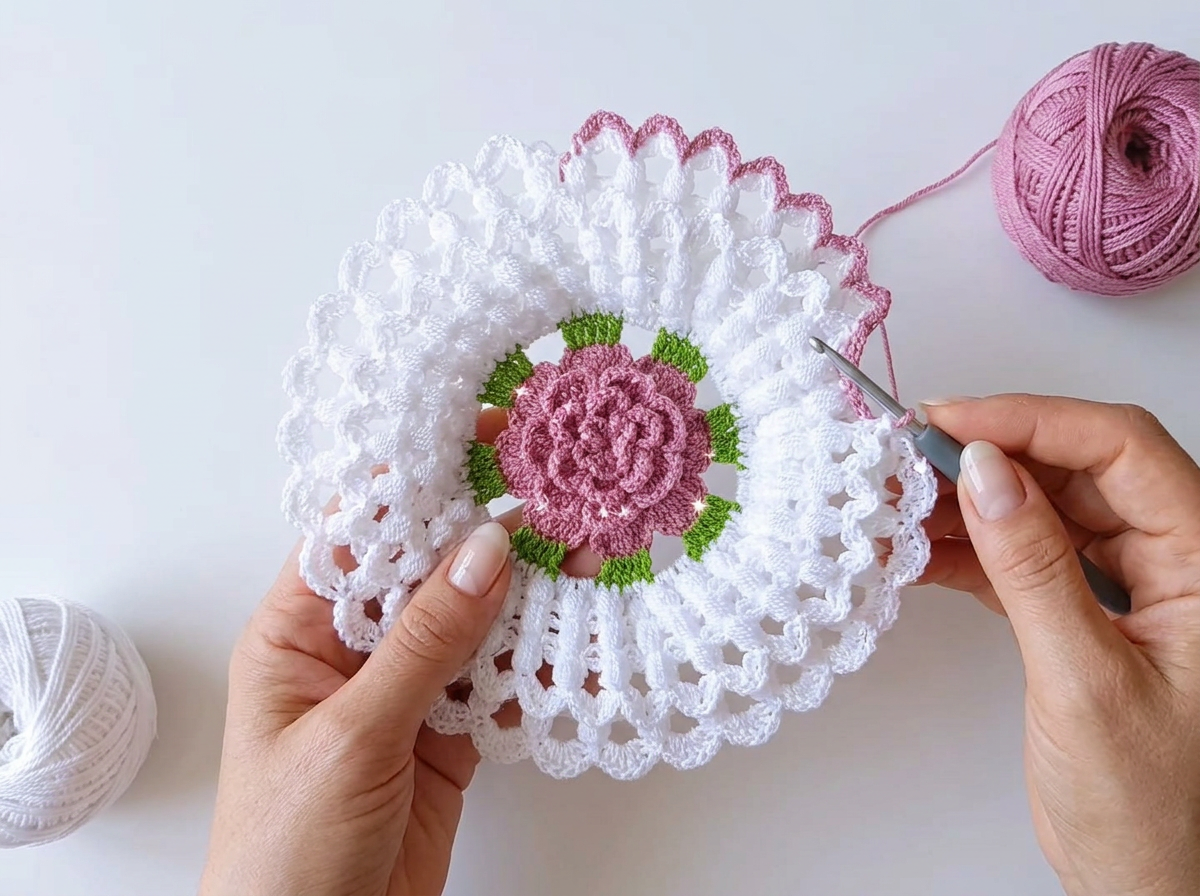
Step 2: Add the Green Leaf Accents
Join green yarn to any exposed back loop or anchor point behind the final round of pink petals. Rnd 6: Ch 1, *sc, ch 3, sl st in 3rd ch from hook (picot made), sc in same st, ch 2, skip next space; repeat from * around to create a ring of small, pointed leaf accents radiating outward from the rose (approx. 8 leaf points). Sl st to first sc to join. Fasten off green.

Step 3: Establish the White Base and Inner Ruffles
Join white yarn to the back loops behind the green leaves. Rnd 7 (Base 1): Ch 3 (counts as dc), work 23 dc evenly around the circular base, join (24 dc). Rnd 8 (Tier 1 Ruffle): Working in FLO of Rnd 7, *puff stitch in st, ch 1; rep from * around, join. Rnd 9 (Base 2): Working in the unworked BLO of Rnd 7, ch 3, *dc in next st, 2 dc in next; rep from * around (36 dc). Rnd 10 (Tier 2 Ruffle): In FLO of Rnd 9, *puff st, ch 1, puff st in same st, ch 1, skip 1; rep from * around. You now have two distinct overlapping white tiers.
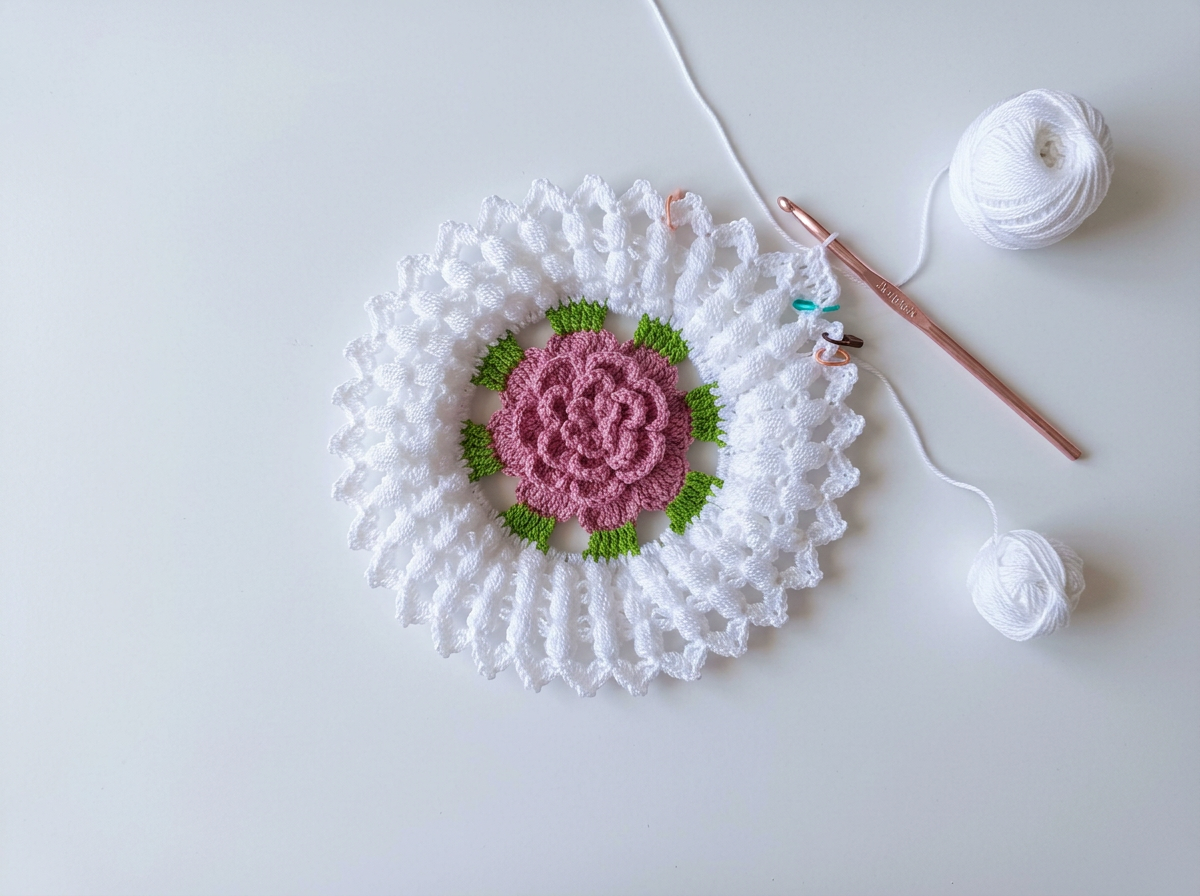
Step 4: Crochet the Outer White Ruffle Tiers
Rnd 11 (Base 3): Working in the unworked BLO of Rnd 9, *dc in next 2 sts, 2 dc in next* around (48 dc). Rnd 12 (Tier 3 Ruffle): In FLO of Rnd 11, *puff st, ch 2, skip 1; rep from * around. Rnd 13 (Base 4): Working in the BLO of Rnd 11, *dc in next 3 sts, 2 dc in next* around (60 dc). Rnd 14 (Tier 4 Ruffle): In both loops of Rnd 13, *puff st, ch 2, puff st in same st, ch 2, skip 2; rep from * around to create the final wide ruffle tier. Fasten off white.
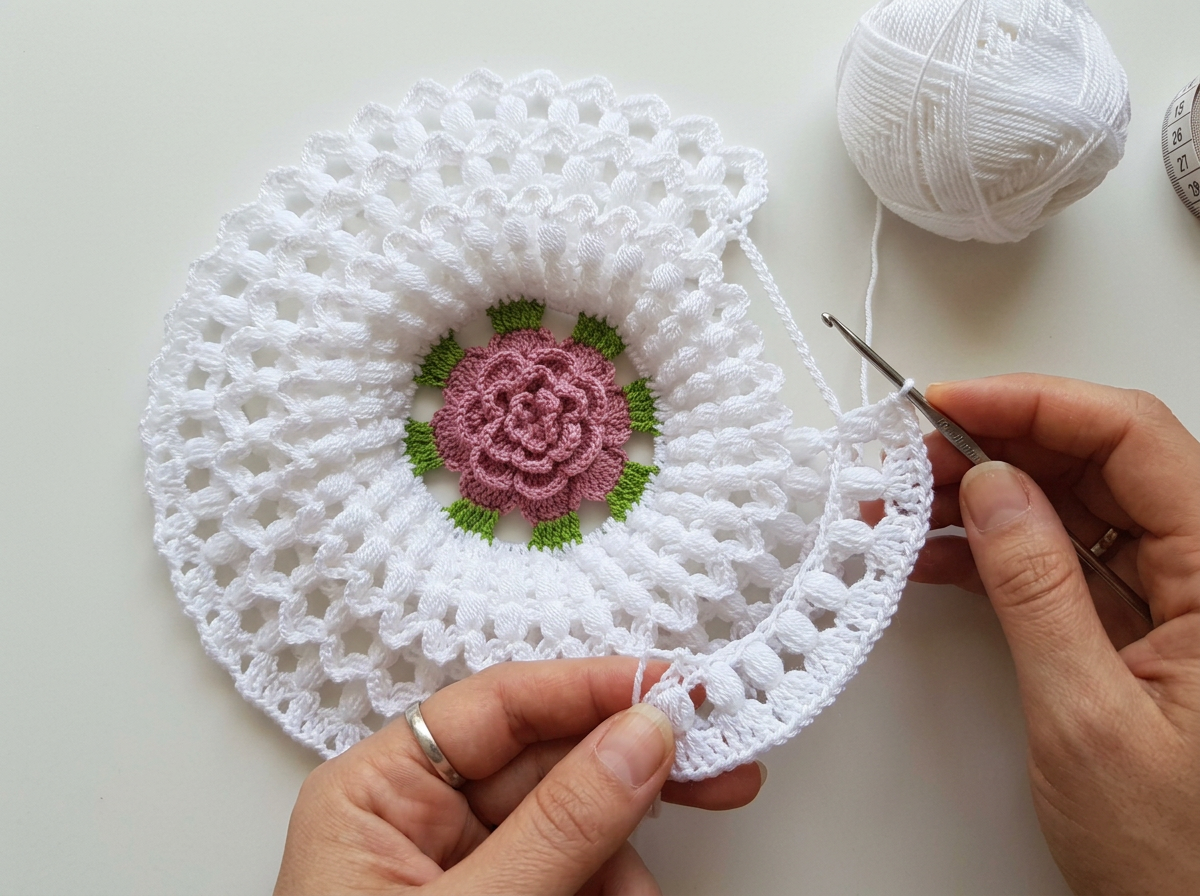
Step 5: Apply Pink Scalloped Edgings
To finish the piece with delicate borders, join dusty pink yarn to any ch-space on the outer edge of the Tier 1 white ruffle. *Sc in space, ch 3, sc in same space (small scallop made), ch 1, skip next puff st; rep from * around the entire edge of the ruffle. Fasten off. Repeat this exact scalloped edging process for the exposed outer edges of Tier 2, Tier 3, and Tier 4, attaching the pink yarn to the chain spaces of each white ruffle round. Weave in all loose ends.
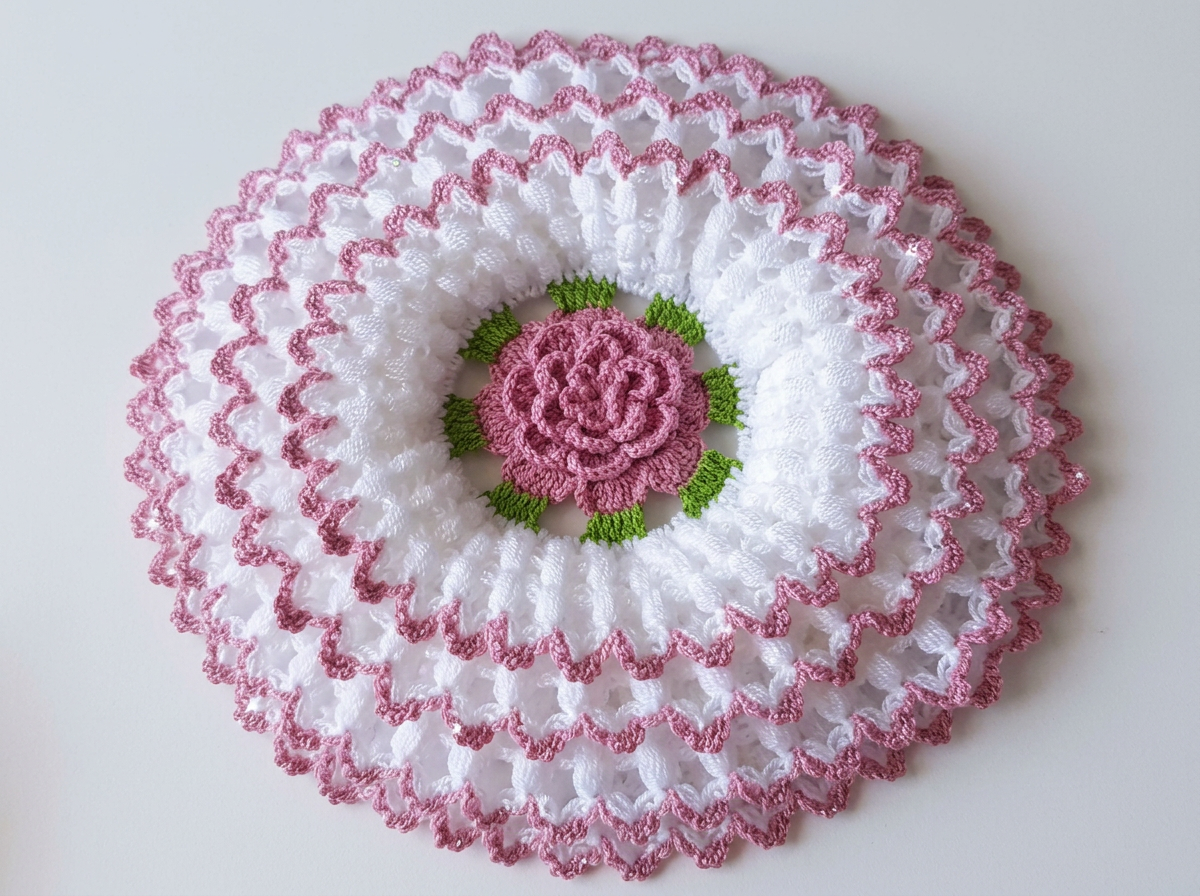
Congratulations on completing your spectacular Ruffled Rose Centerpiece Doily! All those layered ruffles, delicate pink scallops, and intricate 3D petals have finally come together to create a true masterpiece of crochet home decor. Take a moment to gently flatten your doily on a clean, hard surface, lightly shaping the white puff-stitch ruffles and fluffing the central pink rose petals so they stand out perfectly. Because we used a crisp acrylic-cotton blend, your centerpiece should hold its magnificent shape wonderfully without needing aggressive blocking, though a light steam can help the outer edges lay completely flat if your tension was a bit tight.
This stunning doily opens up so many styling possibilities. It looks incredibly elegant sitting seamlessly on a plain white tabletop, allowing the dusty pink and bright green colors to pop. It is also the perfect foundational mat for a minimalist glass vase, a vintage teacup set, or a softly glowing candle. If you are feeling adventurous for your next make, consider experimenting with the color palette! Imagine a deep crimson rose with cream ruffles for a romantic Valentine’s Day vibe, or a sunflower-yellow center with rustic brown edges for a charming autumnal display. You could even omit the final two tiers of white ruffles if you prefer a smaller, more understated coaster-sized motif.
I highly recommend watching the companion video tutorial for this project. The video provides a detailed, visual walkthrough of exactly how to anchor the chain spaces behind the petals, how to smoothly transition between the FLO ruffles and the BLO flat base rounds, and how to seamlessly apply those final pink scalloped edgings. It is a fantastic resource if you are an intermediate crocheter looking to perfect your 3D layering techniques. Don’t forget to share photos of your finished Ruffled Rose Centerpiece Doily online! I absolutely love seeing your color choices and how you style these gorgeous pieces in your own homes. Happy crocheting!


