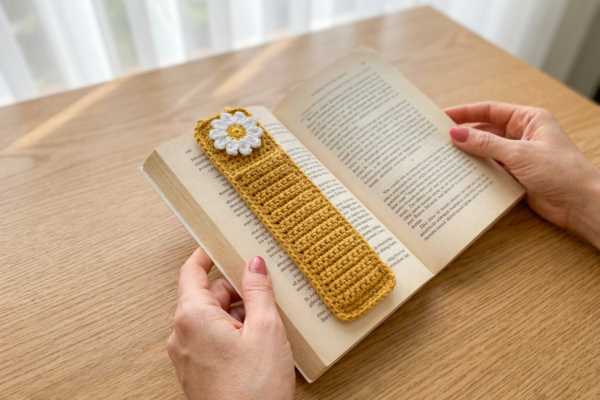
Welcome back, fellow crochet enthusiasts! Today, I am absolutely thrilled to share a pattern that has quickly become one of my favorite floral projects: the Purple Rose Appliqué with Leaves. There is something incredibly magical about creating a three-dimensional flower out of a single, flat strip of crochet. Whether you are looking to embellish a cozy winter beanie, add a pop of color to a plain canvas tote bag, or create a stunning statement brooch, this layered, 3D crocheted purple rose set against a beautiful backing of textured green leaves is the perfect quick project to elevate your accessories.
Roses have long been a symbol of beauty and elegance, and capturing that essence with yarn is a deeply rewarding experience. What makes this specific design so special is the clever construction method. Instead of crocheting the flower and the leaves separately and then struggling to attach them symmetrically, this entire appliqué is constructed from a long, flat foundation strip. We build a simple green grid, add our luscious purple petals, and finish the row with our pointed green leaves. Once the crocheting is done, you simply coil the strip into a flower shape, creating built-in leaves that perfectly frame the outer edge of your rose. When you choose a medium-weight yarn with a smooth, slightly shiny finish, the petals take on an incredible, crisp stitch definition that truly catches the light.
Imagine photographing your finished piece on a dark gray table surface, the vibrant purple and bright green popping wonderfully against the background. I love how these bold, rich colors look, but the beauty of this stash-busting project is that you can customize it completely. Let’s dive into the details so you can start hooking up your own beautiful blooms!
Pattern Info
- Skill Level: Easy / Intermediate. The stitches used are basic (single, half double, double, and treble crochet), but the rolling and sewing assembly requires a bit of patience and spatial awareness.
- Finished Size: Approximately 3.5 to 4 inches in diameter once rolled and sewn, depending on your yarn and tension.
- Gauge: Gauge is not strictly critical for this appliqué, but approximately 4 dc stitches = 1 inch for the recommended medium-weight yarn.
- Abbreviations Used (US Terms): ch = chain, sc = single crochet, hdc = half double crochet, dc = double crochet, tr = treble crochet, sk = skip, sp = space, picot = ch-3 picot (chain 3, slip stitch into the first chain).
Materials
- Yarn: Medium-weight (Category 4 / Worsted) yarn with a smooth, slightly shiny finish (such as mercerized cotton or a polished acrylic). You will need approximately 15-20 yards of Vibrant Purple for the petals, and 15-20 yards of Bright Green for the grid and leaves.
- Hook: 4.0 mm (Size G) crochet hook (or size appropriate for your chosen yarn to maintain tight, crisp stitches).
- Notions: A tapestry yarn needle for sewing the base, stitch markers (optional, to hold the roll in place while sewing), and scissors.
Pattern Overview
The construction of this Purple Rose Appliqué is uniquely satisfying because it relies on a single continuous foundation rather than multiple loose pieces. You will begin by using your bright green yarn to crochet a long foundation chain, transforming it into a row of “window” spaces—a simple filet crochet grid. This grid acts as the structural base of the flower. Next, you will join your vibrant purple yarn and work beautiful, curved shell clusters into the first 14 “windows” to create the petals. After fastening off the purple, you will join the green yarn again to the remaining 6 “windows” of the grid, working a combination of taller stitches and picots to form dramatic, pointed leaves. The real magic happens during assembly: by rolling the strip from the petal end to the leaf end and securing the flat grid bottom, a stunning 3D rose with a natural leaf border instantly blossoms in your hands!
Step-by-Step Instructions
Grab your vibrant yarn and your favorite hook, and let’s start crocheting this beautiful layered rose together!
Step 1: Foundation Chain and Base Grid
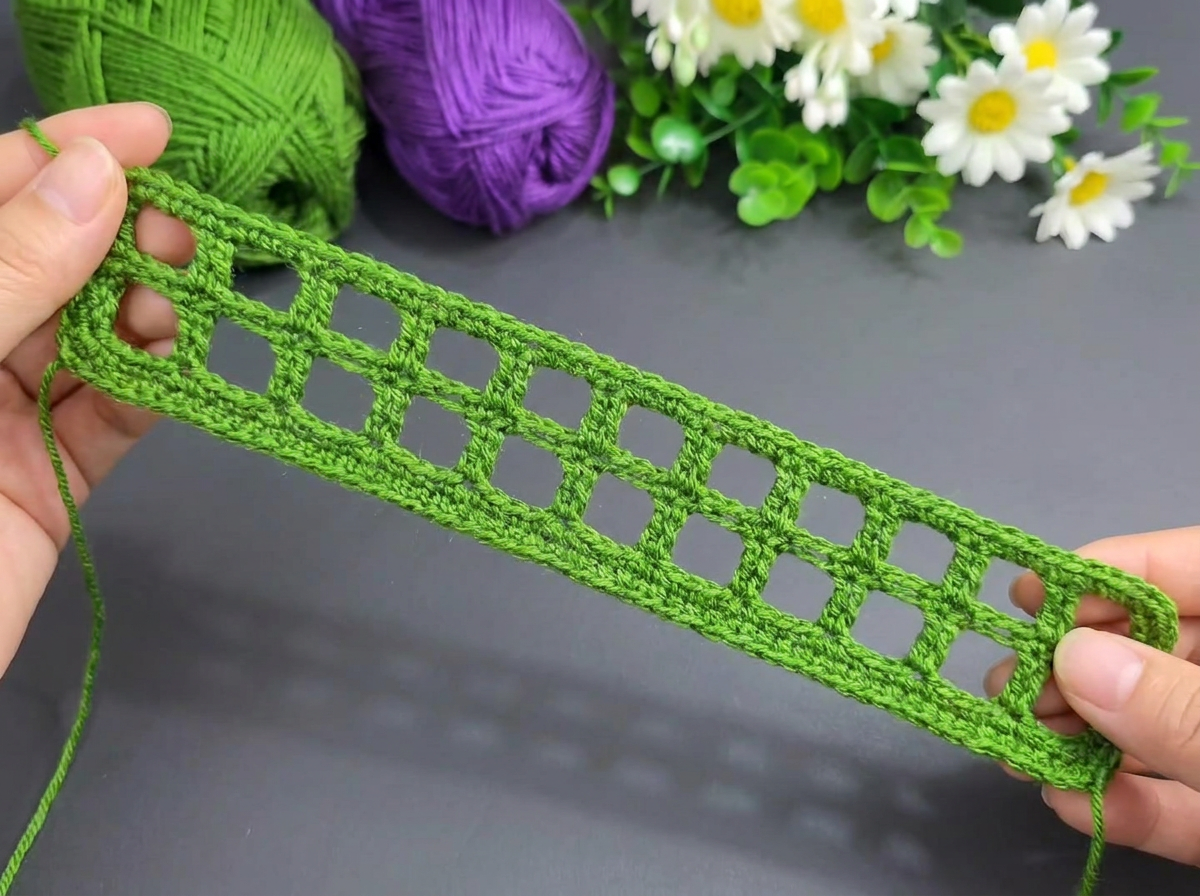
Using bright green yarn, ch 64. Row 1: Dc in the 6th ch from hook (counts as first dc and ch-2 space), *ch 2, skip 2 ch, dc in next ch; repeat from * to end of chain. Fasten off green. You should have 20 'window' spaces along the grid.
Step 2: Purple Petal Shells
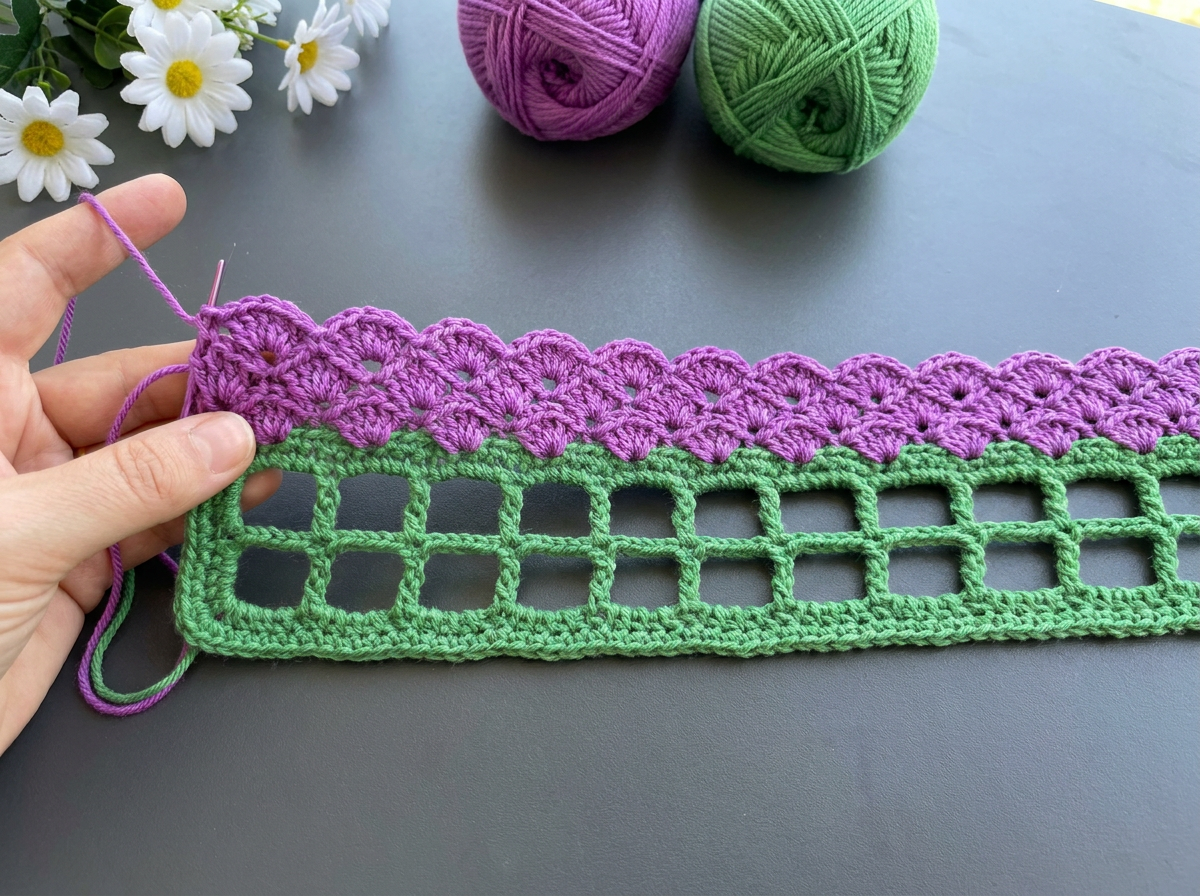
Join vibrant purple yarn to the first ch-2 space of the green grid. Working along the top edge of the windows: Ch 3 (counts as dc), 5 dc in same space, sc in the next space. *6 dc in next ch-2 space, sc in next space; repeat from * for a total of 14 purple petal shells across 14 grid spaces. Fasten off purple.
Step 3: Green Leaf Edging
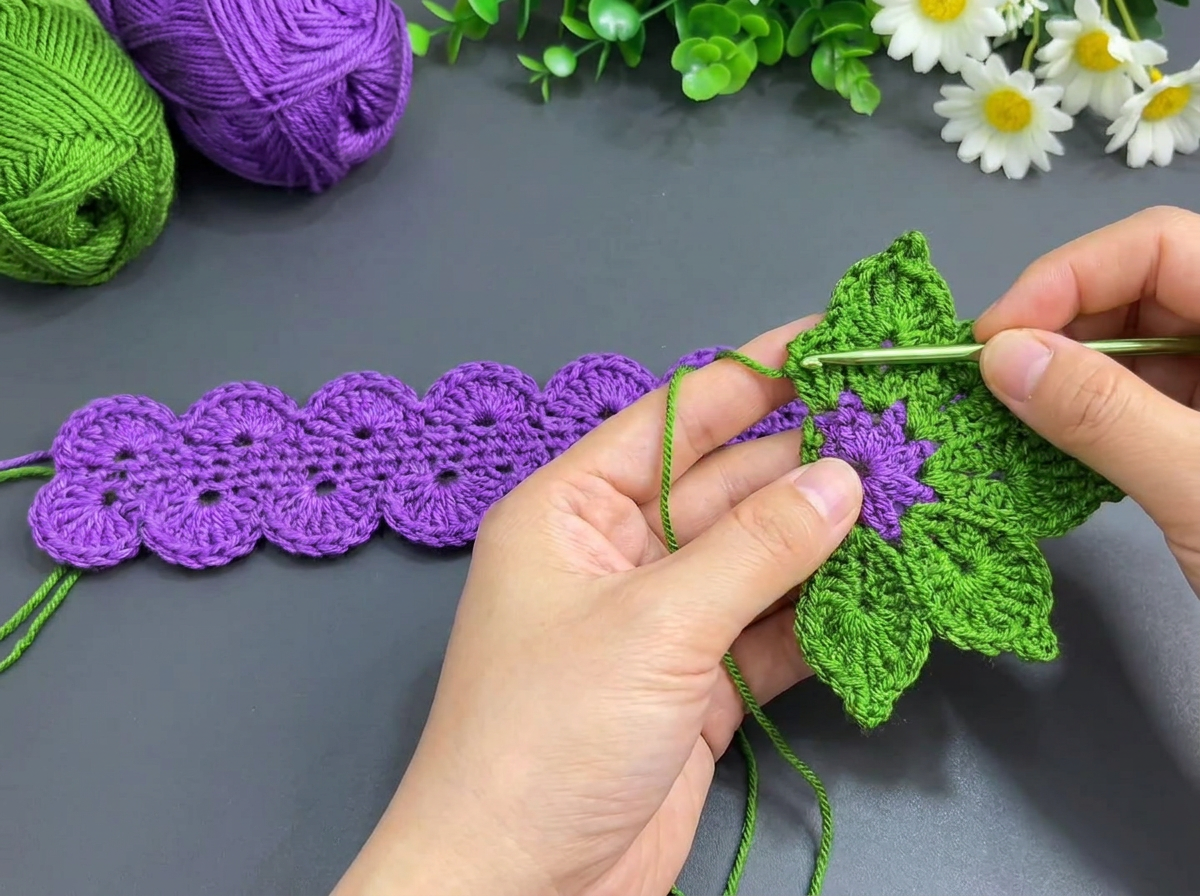
Join bright green yarn to the first bare ch-2 space next to the purple petals. *In the next space work (sc, hdc, dc, tr, ch-3 picot, tr, dc, hdc, sc) to form a pointed leaf; repeat from * in the remaining 6 spaces to create 6 wide, veined green leaves. Fasten off, leaving a long tail for sewing.
Step 4: Rolling the Rose
Starting from the end with the first purple petal, begin rolling the entire strip tightly upon itself. Keep the bottom edge of the green grid aligned to form a flat base, allowing the purple petals to overlap and spiral outward into a 3D rose shape.
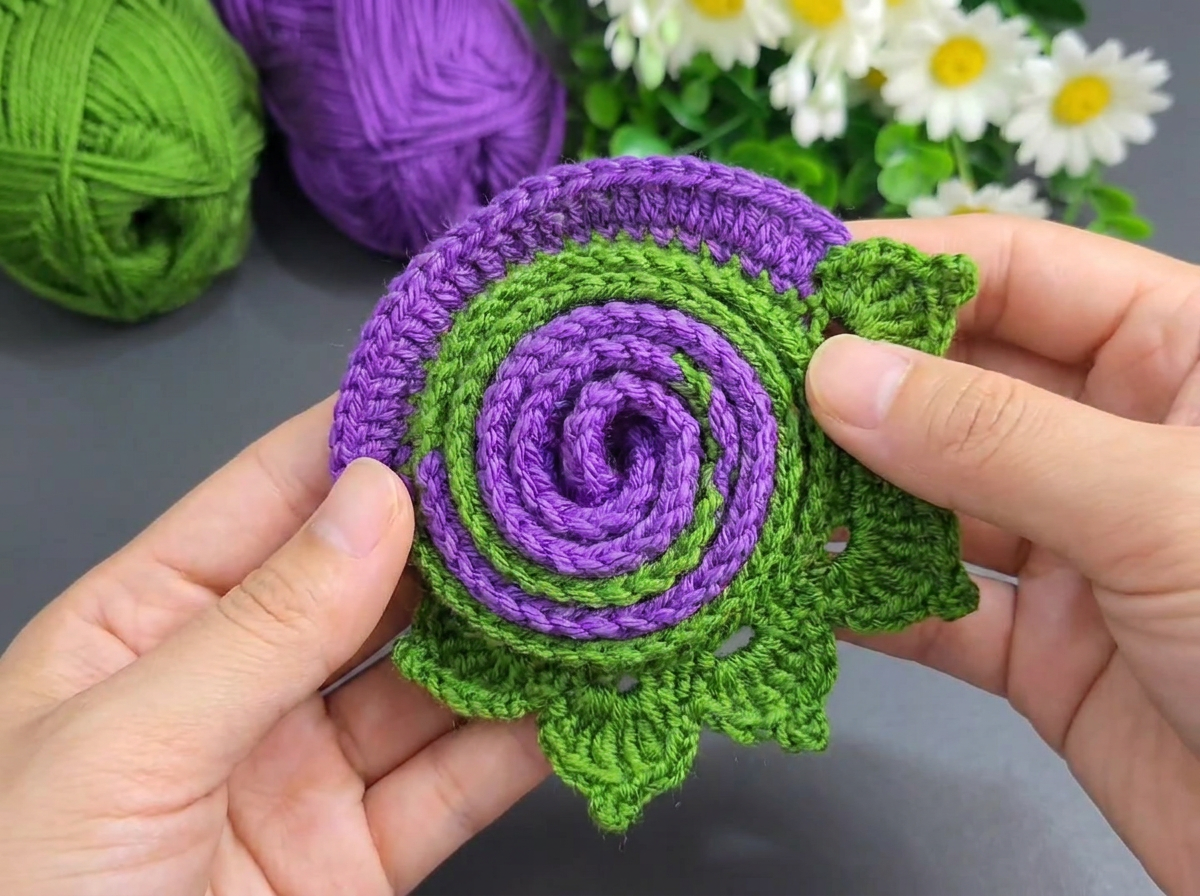
Step 5: Securing the Base and Leaves
Wrap the final green leaf section around the outermost base so the 6 leaves fan outward radially around the bottom of the flower. Using the long green yarn tail and a tapestry needle, sew back and forth through the coiled green base layers at the bottom to secure the spiral shape permanently. Weave in all remaining ends.
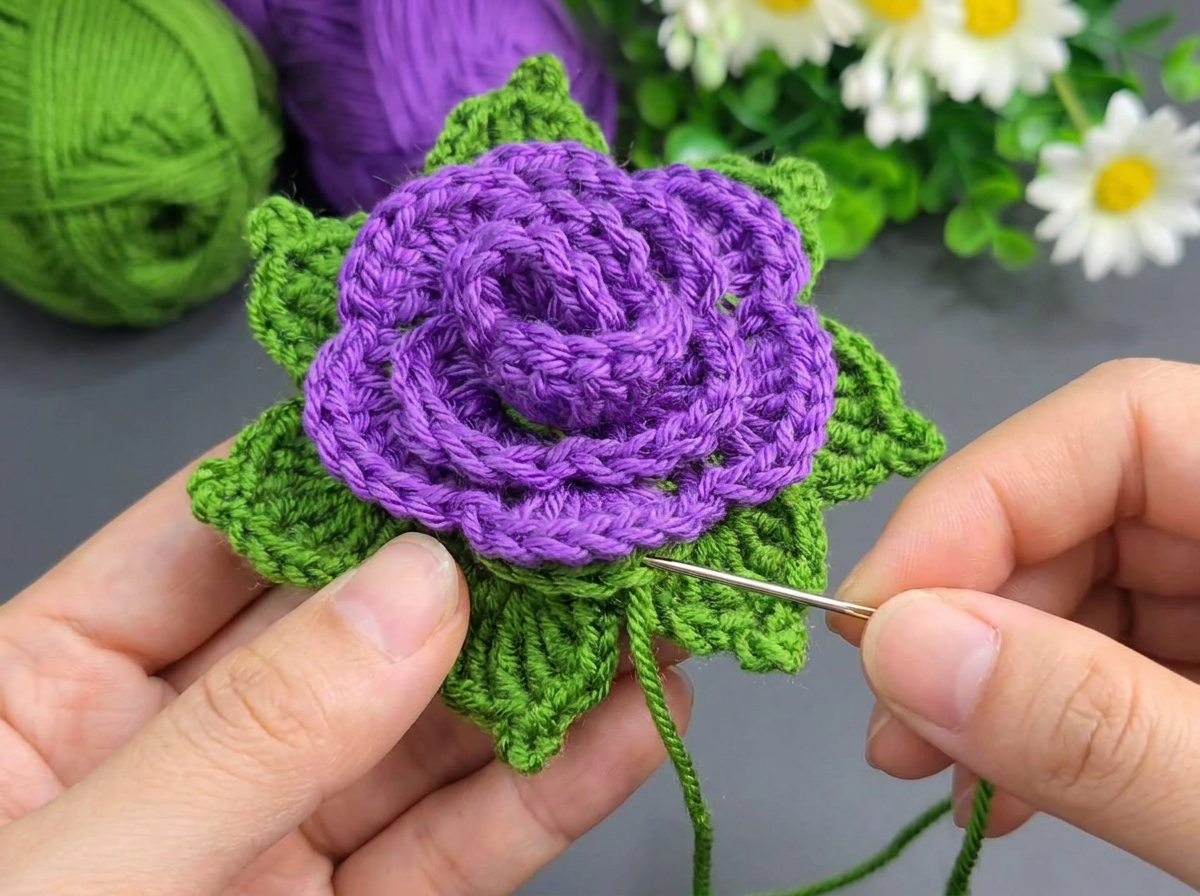
And just like that, your Purple Rose Appliqué with Leaves is complete! Isn’t it incredibly satisfying to watch that flat, squiggly strip of yarn transform into a lush, three-dimensional flower? Once you have the base securely stitched, this beautiful rose is incredibly durable and ready to adorn absolutely anything you can think of. Because the bottom is relatively flat thanks to the coiled green grid, it sits flush against whatever surface you sew it onto.
There are countless ways to use your finished appliqué. I absolutely love sewing a pin backing to the flat green base to turn it into a removable brooch. It looks stunning pinned to the lapel of a denim jacket or decorating a simple sun hat. You could also crochet a delicate chain and attach the rose as a bold statement necklace, or sew it securely to a handmade baby blanket or an afghan square. If you are feeling adventurous, try making a few of these in varying colors—perhaps a soft blush pink, a deep crimson red, or even a sunny yellow—and cluster them together to create a gorgeous floral wreath or a decorative pillow cover.
If you need a little extra help with the rolling and securing process—which can sometimes be tricky to visualize on your first try—please don’t forget to watch the companion video tutorial. In the video, I walk you through the entire process, paying special attention to how to align the grid layers and how to weave the tapestry needle through the thick base to ensure your leaves fan out perfectly. The video also gives you a great look at the crisp stitch definition created by the shiny yarn under bright daylight.
I would absolutely love to see how your beautiful roses turn out! Please share your photos with me on Instagram or in our Facebook group. Seeing the color combinations you choose and the creative ways you use your appliqués always makes my day. Happy crocheting, and I will see you in the next pattern!