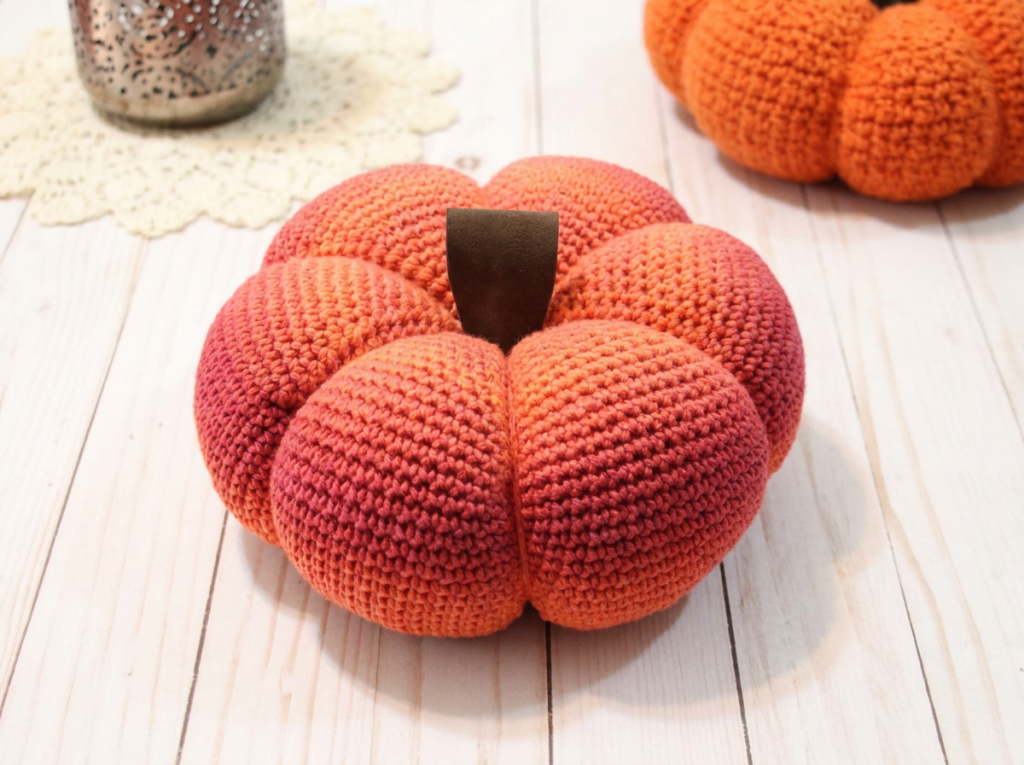
Welcome the autumn season into your home with this beautiful, squishy Gradient Amigurumi Pumpkin! There is something incredibly satisfying about watching a gradient or ombre yarn slowly transition from a bright, vibrant orange to a deep, rich pinkish-red as you stitch. It gives a simple seasonal project an elevated, modern, and almost magical vibe that looks incredible on a rustic light wood-plank table or nestled next to a metallic candle holder. Whether you are looking for a quick and rewarding weekend project, a beautiful centerpiece for your Thanksgiving table, or a unique handmade gift for fall-loving friends, this crochet pumpkin pattern is exactly what you need. The finished pumpkin is wonderfully plump, featuring deeply cinched segments that create realistic lobes, topped off with a rustic dark brown faux suede ribbon loop for a stem. The soft, cozy shadows cast by the gradient yarn’s texture will make you want to crochet an entire patch of them!
If you’ve ever felt intimidated by shaping amigurumi, this project is the perfect confidence builder. You’ll learn the magic of using your yarn tail to sculpt a basic sphere into a highly textured, 3D pumpkin shape. It’s an easy, beginner-friendly technique with a huge visual payoff. By the time you’re done, you’ll have a beautifully squishy, beautifully colored piece of autumn decor that looks far more complex than it actually is.
Pattern Info
- Skill Level: Easy / Advanced Beginner – You’ll need to know basic amigurumi techniques like working in continuous rounds, increasing, invisible decreasing, and basic sewing/sculpting.
- Finished Size: Approximately 3.5 to 4 inches in diameter and 2.5 inches tall, depending on your tension and yarn choice.
- Gauge: Exact gauge is not critical, but aim for approximately 5 sc and 5 rounds = 1 inch using a worsted weight yarn. Your stitches must be tight enough so no stuffing shows through!
- Abbreviations Used (US Terms): sc = single crochet, inc = increase (2 sc in one st), dec = invisible decrease (sc2tog using front loops only), rnd = round, st(s) = stitch(es).
Materials
- Yarn: Worsted weight (Category 4) gradient or ombre yarn transitioning from bright orange to deep pinkish-red. You will need approximately 40-50 yards total for one pumpkin.
- Hook: 4.0mm (US G/6) crochet hook (or size appropriate to achieve a tight, dense fabric with your chosen yarn).
- Stuffing: High-quality polyester fiberfill (polyfill). You will need enough to stuff the pumpkin very firmly to hold its shape when cinched.
- Stem: A 3-inch length of dark brown faux suede ribbon or flat leather cord.
- Notions: A large-eye tapestry needle (for cinching), stitch markers (to mark the beginning of rounds), and a small amount of hot glue or fabric glue.
Pattern Overview
This Gradient Amigurumi Pumpkin is constructed in one continuous piece, starting from the bottom center and working upwards. You will begin by creating a flat circle using a magic ring and standard amigurumi increases. As you transition into the even rounds to build the height of the pumpkin, your gradient yarn will naturally begin to shift from bright orange towards those beautiful deeper pink and red tones. After building the sides into a bowl shape, you will decrease to close the top of the sphere, pausing to stuff the piece very firmly. The real magic happens after you fasten off! Using a very long yarn tail and a tapestry needle, you will wrap and cinch the sphere vertically to create eight distinct, squishy lobes that turn a simple round ball into a realistic pumpkin. Finally, we ditch the traditional crocheted stem for a modern, rustic touch: a simple folded loop of faux suede ribbon glued securely into the top indentation.
Step-by-Step Instructions
Grab your hook, your favorite gradient yarn, and let’s get making!
Step 1: Starting the Pumpkin Base
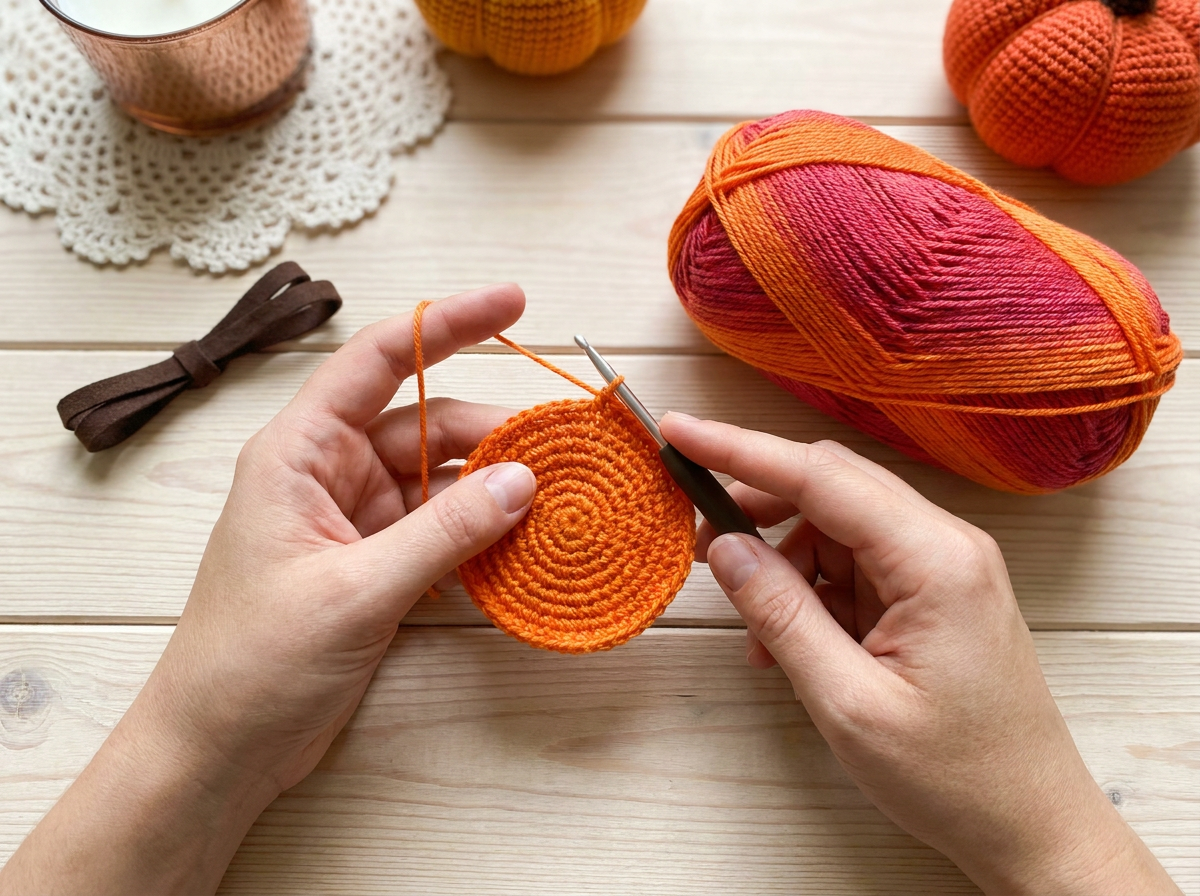
Start the pumpkin body at the bottom center. Using the bright orange end of your gradient yarn, make a magic ring. Rnd 1: 6 sc in ring (6 sts). Rnd 2: 2 sc in each st around (12 sts). Rnd 3: [1 sc, inc] 6 times (18 sts). Rnd 4: [2 sc, inc] 6 times (24 sts). Rnd 5: [3 sc, inc] 6 times (30 sts). Rnd 6: [4 sc, inc] 6 times (36 sts). Rnd 7: [5 sc, inc] 6 times (42 sts).
Step 2: Building the Sides
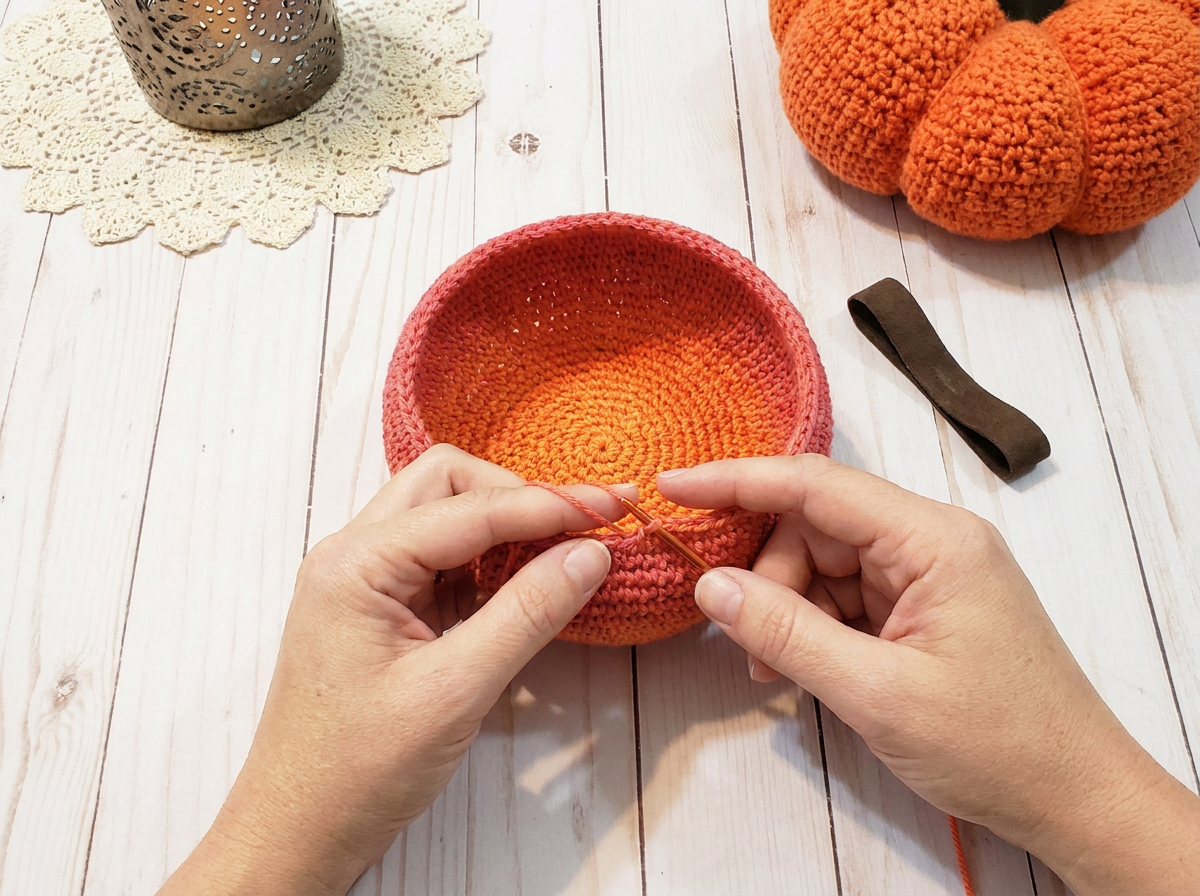
Now work even rounds to build the height of the pumpkin, allowing the gradient yarn to naturally shift toward the deeper pinkish-red tones. Rnds 8-18: 1 sc in each st around (42 sts). The piece will naturally curl upwards into a bowl shape. Keep your tension tight so the stuffing won't show through later.
Step 3: Decreasing and Stuffing
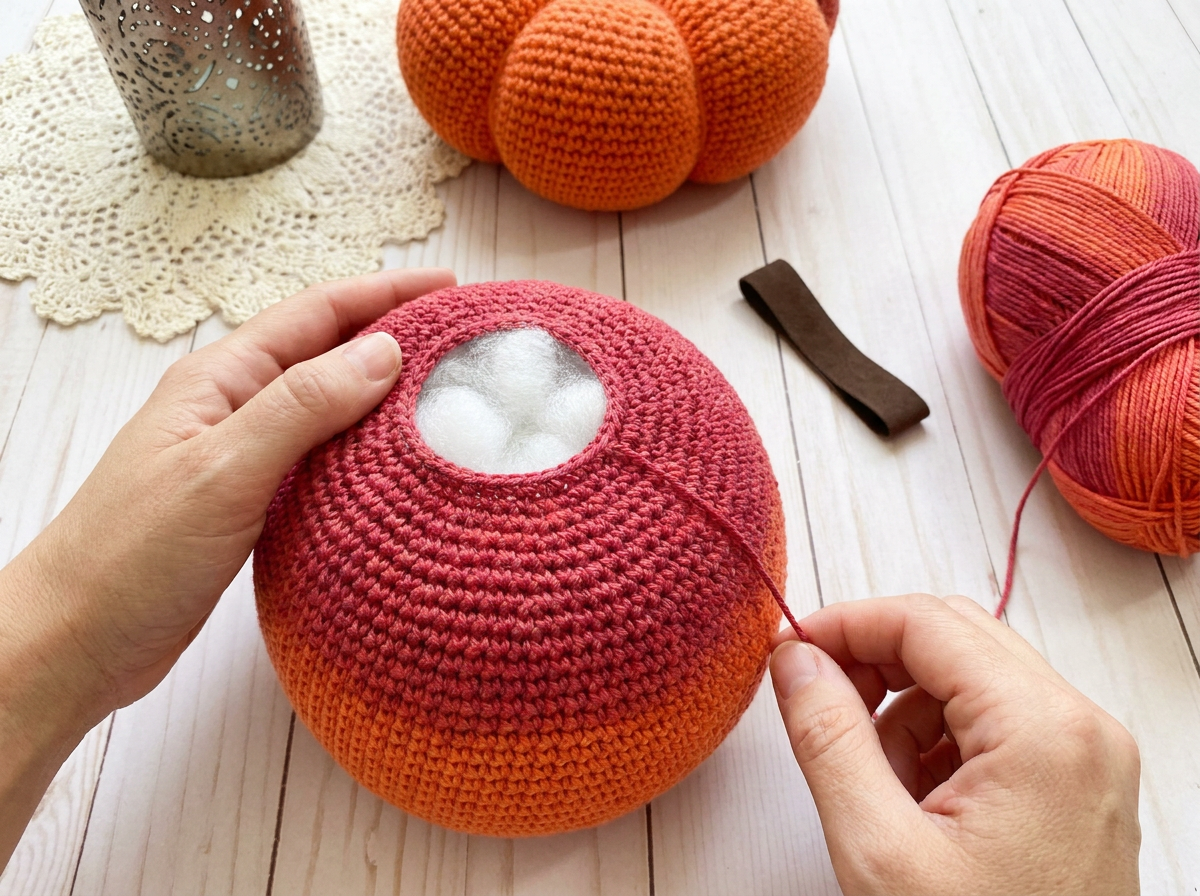
Begin decreasing to close the top of the sphere. Rnd 19: [5 sc, dec] 6 times (36 sts). Rnd 20: [4 sc, dec] 6 times (30 sts). Rnd 21: [3 sc, dec] 6 times (24 sts). Pause here and stuff the pumpkin very firmly with polyfill. Rnd 22: [2 sc, dec] 6 times (18 sts). Rnd 23: [1 sc, dec] 6 times (12 sts). Rnd 24: 6 dec (6 sts). Fasten off, leaving a very long tail (about 36 inches) for shaping.
Step 4: Cinching the Lobes
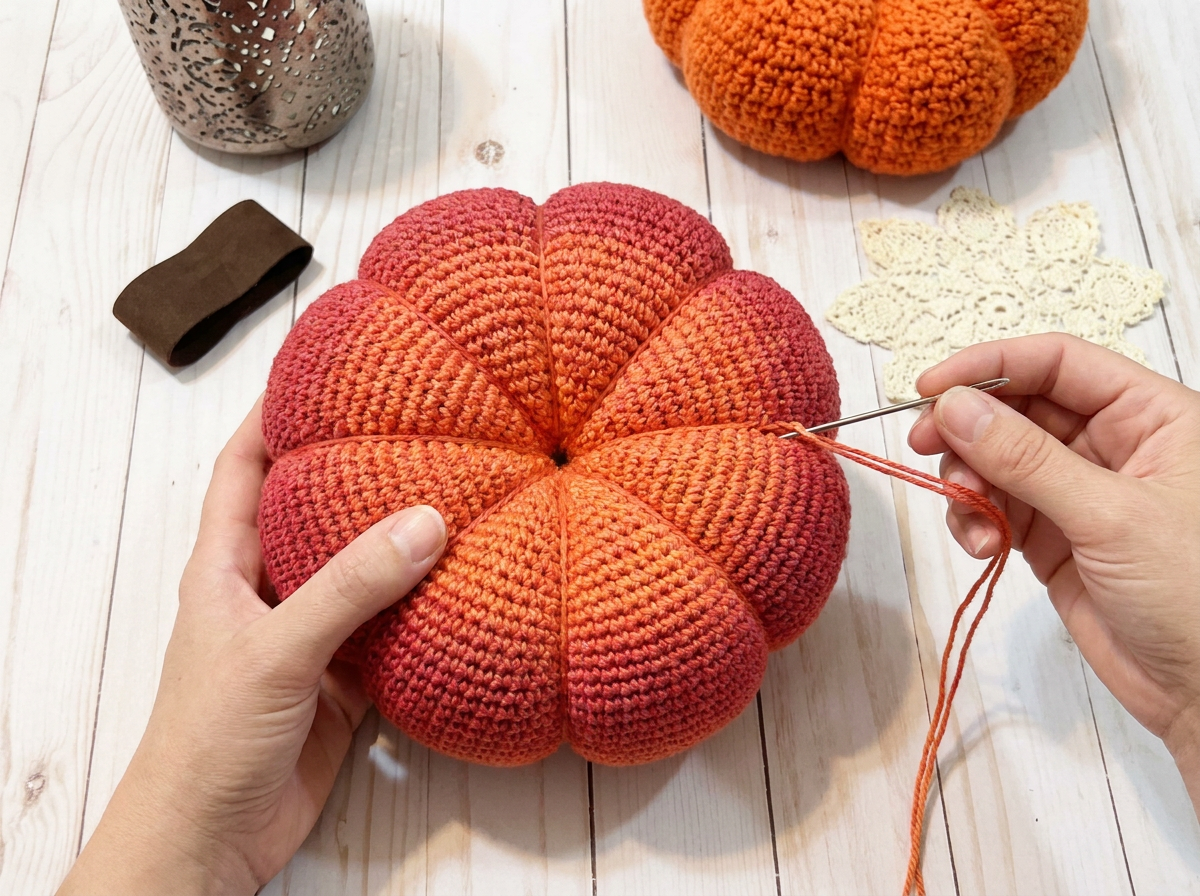
Thread the long pinkish-red yarn tail onto a large tapestry needle. Insert the needle straight down through the remaining top center hole and out the bottom center of the pumpkin. Pull tight to create a deep indent at the poles. Wrap the yarn vertically up the outside of the sphere, insert the needle back into the top center, and out the bottom again. Pull tightly to create your first lobe. Repeat this wrapping and cinching process evenly around the outside to divide the pumpkin into 8 squishy, bulging segments. Knot securely at the bottom and weave in the end.
Step 5: Adding the Stem
To create the rustic stem, cut a 3-inch length of dark faux suede ribbon or flat leather cord. Fold it in half to form a short loop. Apply a small drop of hot glue or fabric glue to the cut ends and insert them firmly into the cinched top center indent of the pumpkin. Hold in place for a few seconds until secure.
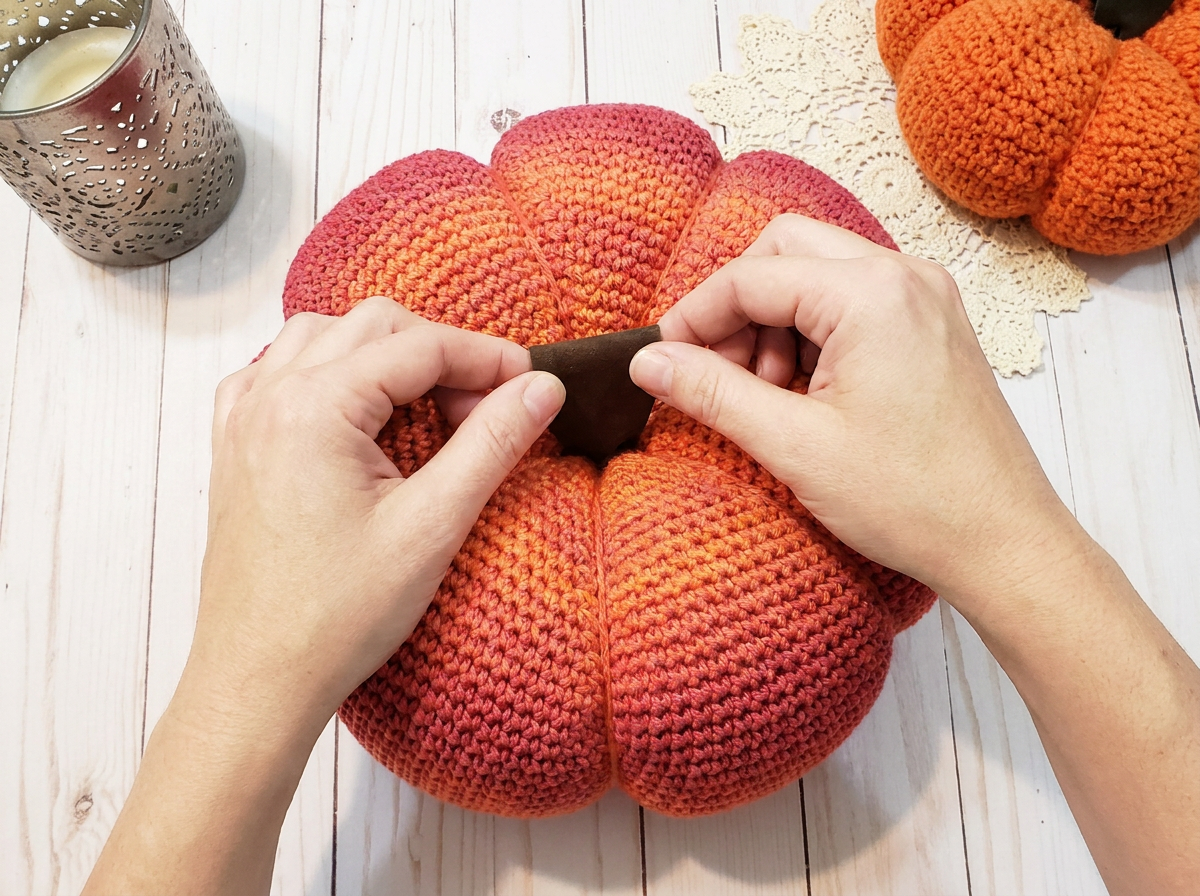
And just like that, your beautiful Gradient Amigurumi Pumpkin is complete! The way the color shifts from that bright, cheerful orange at the base to the deep, moody pinkish-red at the top, perfectly accented by the rustic suede loop, makes this so much more than your standard crochet pumpkin. It is a true testament to how simple techniques—like strategic wrapping and a pop of mixed materials—can completely elevate an easy crochet project.
Styling Your Amigurumi Pumpkin
Now that you have one finished, you’ll probably want to make a whole patch! These pumpkins look absolutely stunning styled in groups. Try resting them on a light wood surface alongside some lacy white doilies, metallic candle holders, and perhaps some solid-colored pumpkins for contrast. They make incredible additions to a fall mantelpiece, charming place-settings for a Thanksgiving dinner table, or even sweet little seasonal gifts for teachers and coworkers. Because the gradient yarn does all the heavy lifting with color work, no two pumpkins will look exactly alike, making your autumn display uniquely yours.
Share Your Creations!
I hope you enjoyed following along with this pattern and watching your pumpkin take shape. If you are more of a visual learner or want to double-check your cinching technique, be sure to watch the companion video tutorial where I walk you through the entire process, step-by-step. I would absolutely love to see how your gradient pumpkins turn out! Please share your finished photos with me on social media by tagging me and using the project hashtag. Happy fall crocheting, and enjoy your beautiful new handmade decor!