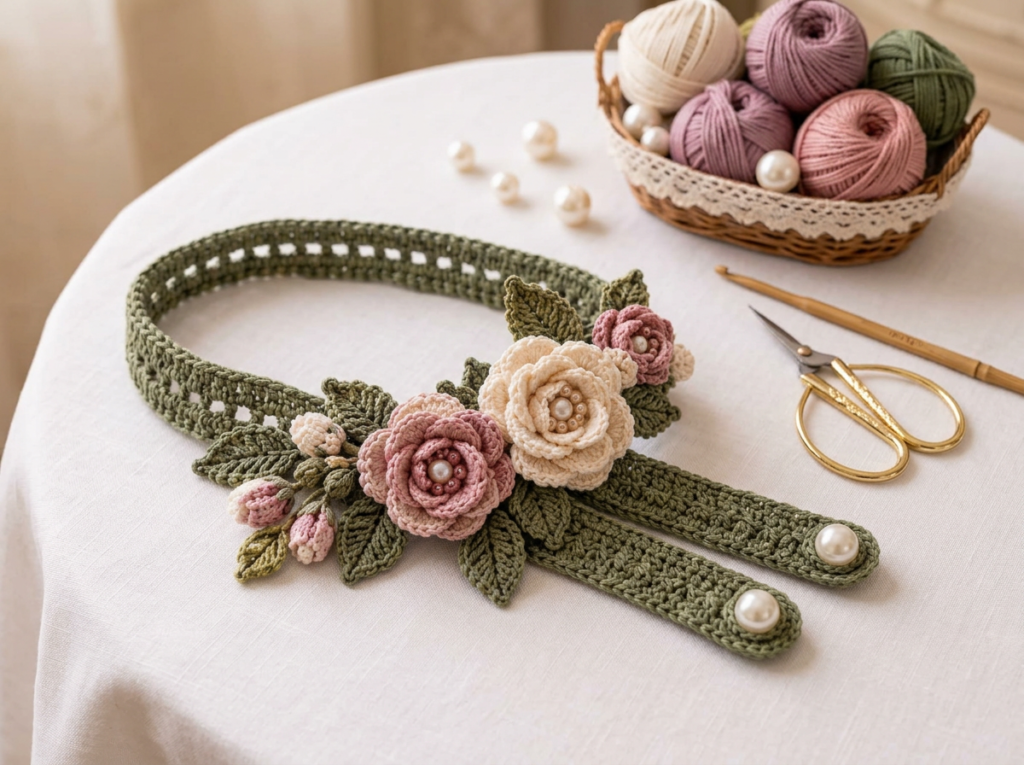
Welcome to a crochet project that will instantly elevate the ambiance of any room in your home. The Floral Pearl Curtain Tieback is a masterclass in romantic, vintage-inspired home decor, blending rustic charm with delicate elegance. If you have been looking for a way to add a touch of handmade luxury to your living space, this project is the perfect fit. Picture a soft, sunlit room with sheer white linen curtains gracefully pulled back by a beautiful cluster of layered crochet roses, delicate flower buds, and vibrant green leaves, all embellished with timeless faux pearls. It is a stunning visual that you can now recreate with your own two hands.
This pattern is more than just a functional item; it is a piece of art that teaches and reinforces valuable crochet skills. You will work on creating a sturdy, breathable lattice base strap that provides the perfect foundation without adding bulk. Then, the real magic happens as you crochet intricate, multi-layered roses. By alternating between front loops and back loops, you will build up gorgeous, three-dimensional petals that look freshly bloomed. We will finish the floral arrangement with beautifully textured leaves and adorable, lightly stuffed flower buds before tying it all together with pearl accents. Whether you are crafting this for your own bedroom, making a thoughtful housewarming gift, or creating decor for a romantic rustic wedding, this curtain tieback is sure to impress.
Pattern Info
- Skill Level: Intermediate. You will need to be comfortable working in the round, alternating between front and back loops (FLO/BLO) to create layered petals, and sewing multiple components together into a cohesive cluster.
- Finished Size: The lattice strap measures approximately 16-18 inches in length (customizable), and the central floral cluster measures about 5-6 inches across.
- Gauge: For the lattice strap: 8 sts (4 dc, 4 ch-1 spaces) and 4 rows = 2 inches. Gauge is not strictly critical for the flowers, provided you use the same hook and tension.
- Abbreviations Used (US Terms): sc = single crochet, hdc = half double crochet, dc = double crochet, inc = increase, dec = invisible decrease, ch = chain, sl st = slip stitch, rnd = round, st(s) = stitch(es), sp = space, sk = skip, FLO = front loops only, BLO = back loops only.
Materials
- Yarn: Sport-weight cotton yarn (Category 2). You will need approximately 50 yards of Olive Green (for the strap, leaves, and bud stems), 30 yards of Cream (for the large rose), 20 yards of Dusty Rose (for the medium rose and buds), and 20 yards of Mauve (for the small roses).
- Hook: Size E/4 (3.5mm) crochet hook to keep the stitches tight and the petals beautifully structured.
- Notions: Faux pearl beads (assorted sizes for the flower centers), sewing needle and matching sewing thread (for attaching beads), a small amount of polyfill stuffing (for the flower buds), two medium-sized faux pearl buttons (for the closure), a tapestry needle, and stitch markers.
Pattern Overview
This project is constructed in several distinct stages, allowing you to enjoy bite-sized crochet sessions before bringing everything together. We begin by crocheting the lattice base strap in olive green, using a simple double crochet and chain-space mesh that creates a lightweight but strong band. Next, we move onto the stars of the show: the layered roses. You will start with a magic ring and work outward, cleverly using front and back loops to build tiers of petals. You will make one large cream rose (4 tiers), one medium dusty rose (3 tiers), and two small mauve roses (2 tiers). After the roses are complete, we will crochet the foliage, including large and small ribbed leaves and three-dimensional, lightly stuffed buds. Finally, the assembly stage brings your vision to life. You will sew pearl beads into the flower centers, stitch the floral components together into a beautiful cluster, and securely attach it to the strap, finishing off with elegant pearl button closures.
Step-by-Step Instructions
Grab your hook and let’s start blooming—follow along with the detailed steps below!
Step 1: Crochet the Lattice Base Strap
Using olive green yarn, ch 65. Row 1: dc in 5th ch from hook, *ch 1, sk 1 ch, dc in next ch; rep from * to end. Turn. Rows 2-4: ch 4 (counts as dc, ch 1), skip first ch-1 sp, *dc in next dc, ch 1, sk ch-1 sp; rep from * to last st, dc in 3rd ch of turning ch. Turn. Fasten off. For the button loops, attach yarn to one short end, ch 6, sl st into corner, ch 6, sl st into next corner. Fasten off and weave in ends.

Step 2: Crochet the Layered Roses
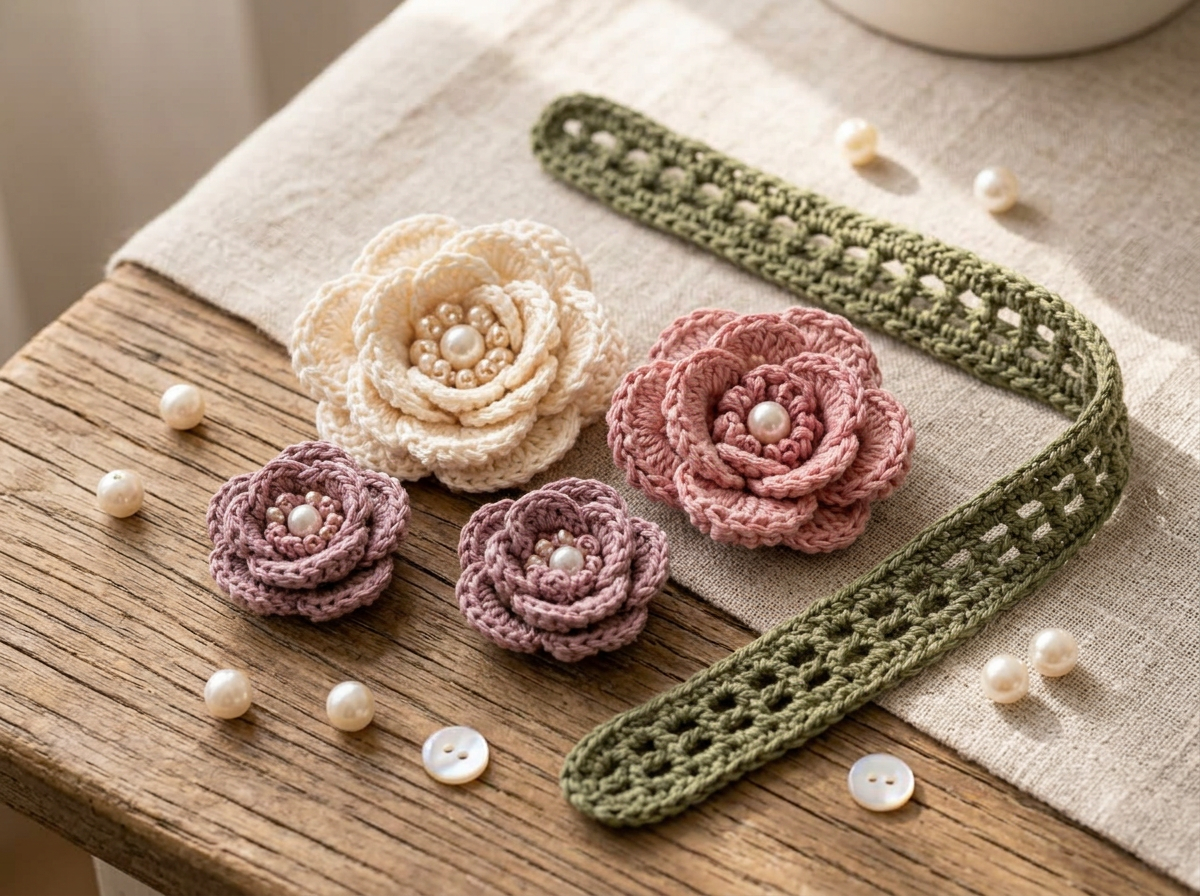
Large Cream Rose: Magic ring, 6 sc. Rnd 1: Working in front loops only (FLO), (sc, hdc, 3 dc, hdc, sc) in each st (6 petals). Rnd 2: Working in back loops (BLO) of rnd 1 base, inc in each st (12 sts). Rnd 3: FLO, (sc, hdc, 3 dc, hdc, sc) in next st, sl st in next; repeat around. Continue alternating BLO increase rounds and FLO petal rounds for 4 petal tiers. Fasten off. Repeat the process using dusty rose yarn for one medium rose (3 tiers) and mauve yarn for two small roses (2 tiers).
Step 3: Crochet the Leaves and Flower Buds
Large Leaf (make 5): With olive green, ch 13. Sc in 2nd ch, hdc in next, dc in next 8, hdc in next, 3 sc in last ch. Working down opposite side of ch: hdc, dc in 8, hdc, sc. Sl st to join. Rnds 2-3: Work in BLO, sc around, working (sc, ch 1, sc) at the tip. Fasten off. Make 4 small leaves (start ch 9). Buds (make 3): With dusty rose, magic ring 6 sc, inc to 12 sc, work 2 rounds even, dec to 6 sc, stuff, fasten off. With olive green, work 6 sc around bud base, ch 3 for picot sepals, sl st, and ch 10 for the stem.

Step 4: Embellish and Assemble the Floral Cluster
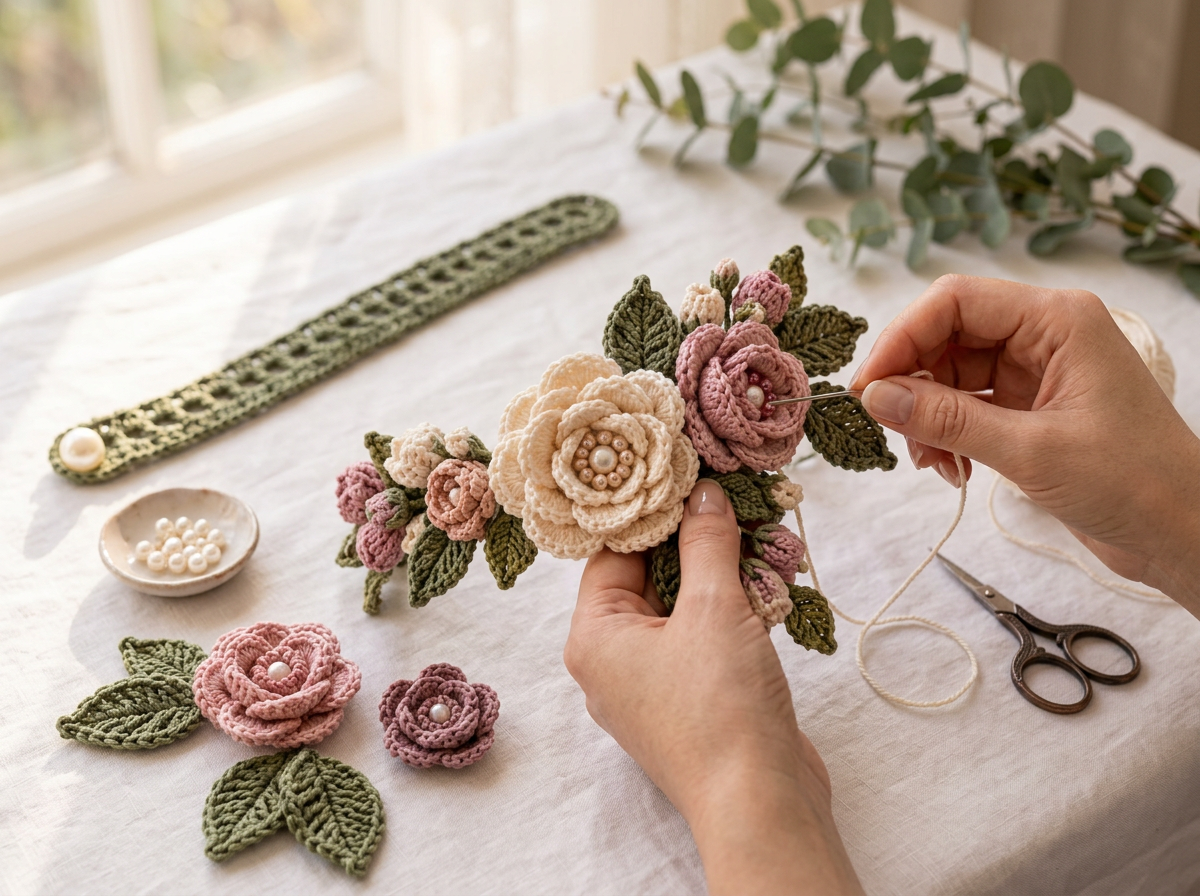
Thread a needle with matching thread and sew faux pearl beads securely into the centers of each rose (a cluster of pearls for the large cream rose, and single pearls for the medium and small roses). Lay out the large leaves and small leaves in a fan shape. Position the large cream rose in the center, flanked by the medium and small roses. Tuck the bud stems beneath the large rose. Using a tapestry needle and olive green yarn, securely stitch the leaves, buds, and roses together from the back into a single, cohesive floral arrangement.
Step 5: Attach the Cluster and Buttons to the Strap
Center the assembled floral cluster on the front of the olive green lattice strap. Using an invisible stitch and matching yarn, sew the floral cluster securely to the strap, ensuring the heavy flowers do not droop. Finally, on the opposite end of the strap from the loops (the end without loops), sew two medium faux pearl buttons corresponding to the placement of the chain loops. Weave in all remaining ends to complete the tieback.

Congratulations on completing your spectacular Floral Pearl Curtain Tieback! Gathering all those delicate layers, leaves, and pearls into a single cohesive piece is incredibly satisfying, and you now have a breathtaking home decor item that radiates handmade love. The contrast between the open olive green lattice and the dense, textured floral cluster makes this piece truly pop against any fabric.
When it comes to styling, this tieback absolutely shines against sheer, neutral curtains—think soft whites, creams, or natural linen. The diffused light passing through the fabric will highlight the dusty rose and mauve tones beautifully. If you want to take the romantic vibe even further, consider making a matching second tieback for the opposite curtain panel, or even crafting a few standalone roses to attach to throw pillows or a lampshade in the same room. These tiebacks also make phenomenal gifts for Mother’s Day, bridal showers, or housewarming parties. The addition of the pearl bead buttons makes it easily adjustable and adds that final touch of professional polish.
I highly recommend watching the companion video tutorial if you want to see exactly how I arrange the floral cluster and balance the leaves—sometimes seeing the assembly in motion makes all the difference when you are aiming for that perfect fan shape. Thank you so much for crocheting along with me! Please share photos of your finished curtain tiebacks on social media; I love seeing how you style them in your beautiful homes.