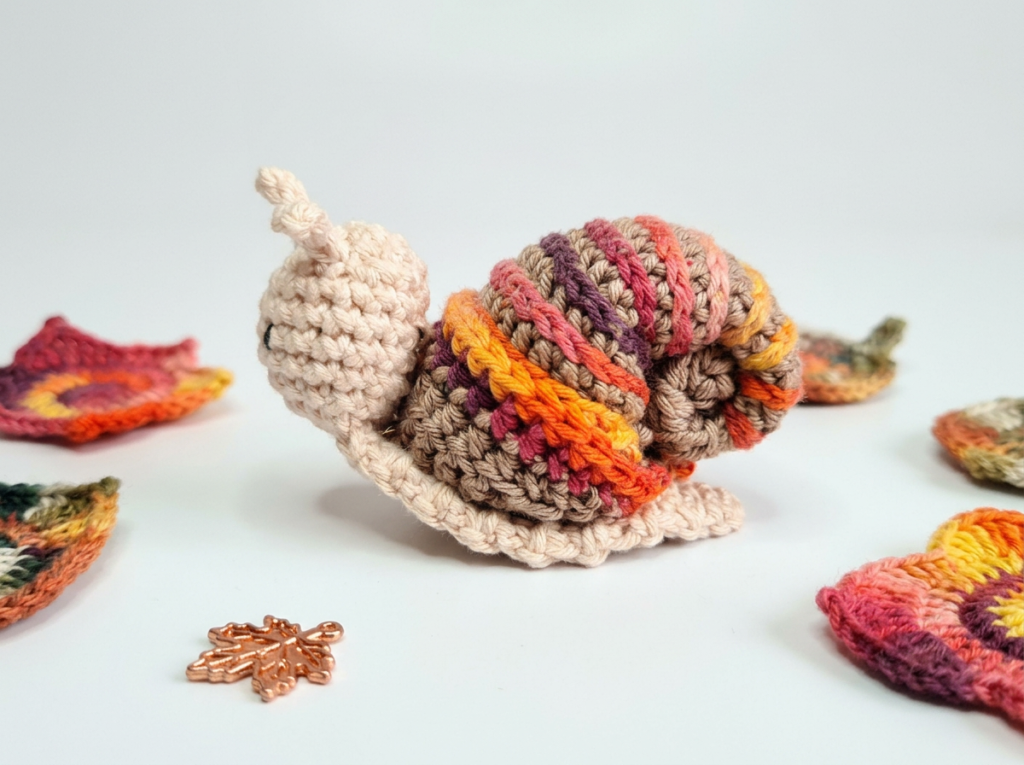
Welcome the crisp autumn breeze and the beautiful changing leaves with a charming little project: the Autumn Snail Amigurumi! As the seasons shift, there is nothing quite like cozying up with a warm beverage and a delightful, nature-inspired crochet project. This adorable snail captures the essence of fall with its pale beige body and a unique coiled shell featuring vivid, textured ridges in yellow, orange, red, and purple. Whether you are looking to add a whimsical touch to your seasonal table centerpiece, create a sweet gift for a nature-loving friend, or simply want to practice your amigurumi shaping, this project is absolute perfection.
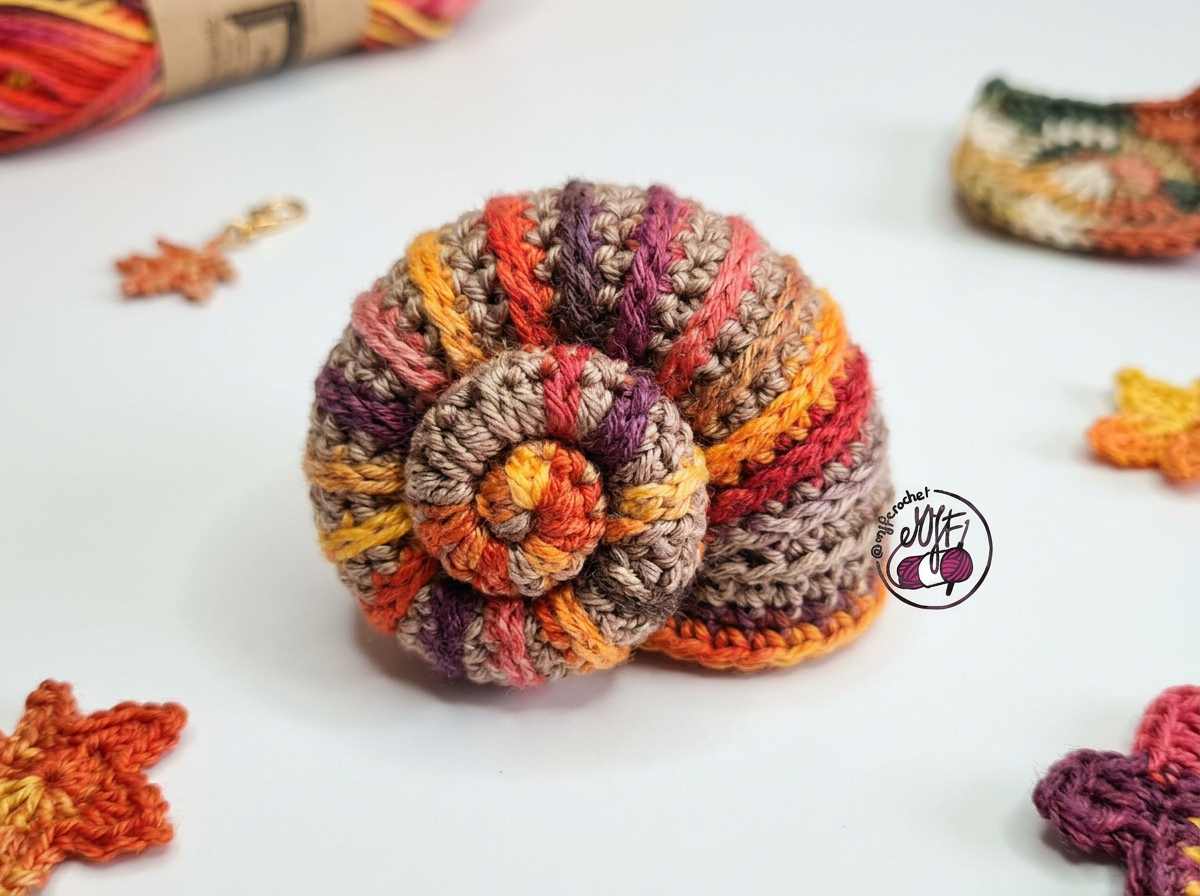
What makes this Autumn Snail Amigurumi so special is the unique construction of the shell. Instead of working a traditional round sphere, you will crochet a long, gently tapering tube, add gorgeous surface slip stitches to create ridges, and physically roll it into a spiral before sewing it into place. This gives the shell a highly realistic, three-dimensional texture that looks fantastic from every angle. Paired with a delicate, ruffled foot and sweet little antennae, this snail is bursting with personality.
Pattern Info
- Skill Level: Easy / Intermediate – Requires basic amigurumi skills, surface slip stitching, and structural sewing.
- Finished Size: Approximately 3 inches tall and 4 inches long when made with the suggested yarn.
- Gauge: 6 sts and 6 rounds = 1 inch in single crochet.
- Abbreviations Used (US Terms): sc = single crochet, inc = increase, dec = invisible decrease, ch = chain, sl st = slip stitch, rnd = round, st(s) = stitch(es).
Materials
- Yarn: Sport weight cotton yarn (Category 2). You will need approximately 25 yards of Taupe (for the shell), 20 yards of Pale Beige (for the body), and 10 yards of a color-changing autumn yarn (yellow/orange/red/purple) for the shell ridges.
- Hook: 2.5 mm crochet hook.
- Notions: Fiberfill stuffing, a tapestry needle/yarn needle, stitch markers, and a small amount of black embroidery floss for the eyes.
Pattern Overview
This Autumn Snail Amigurumi is constructed in three main phases. First, we will create the signature shell by crocheting a long, gently increasing tube in taupe yarn, lightly stuffing it as we go. Before coiling it, we will add beautiful, colorful ridges using surface slip stitches. Once the tube is complete, it is rolled tightly into a spiral and sewn permanently into shape. Next, we move on to the snail’s body, starting at the head with its built-in antennae, and working down to a flattened foot with a delicate ruffled edge. Finally, we will assemble the pieces by securely sewing the coiled shell onto the snail’s back.
Step-by-Step Instructions
Grab your hook and yarn, and let’s bring this adorable autumn snail to life!
Step 1: Crocheting the Shell Tube
Begin the shell tube using taupe yarn. Rnd 1: 6 sc in a magic ring (6). Rnd 2: [1 sc, inc] x 3 (9). Rnds 3-30: Continue working in a continuous spiral, increasing by 1 stitch every 5 rounds until you reach 15 sts, stuffing the tube lightly as you go. To create the colorful ridges, work surface slip stitches in front loops every 4th round using a color-changing autumn yarn (yellow, orange, red, purple).

Step 2: Coiling the Shell
Finish the tube (Rnd 31: dec around to close, fasten off). Firmly stuff the remaining length. Carefully roll the tube tightly upon itself starting from the narrow end to form a spiral shell shape. Using a tapestry needle and taupe yarn, sew through the layers of the coiled tube to secure the spiral so it holds its shape permanently.
Step 3: Starting the Snail Body
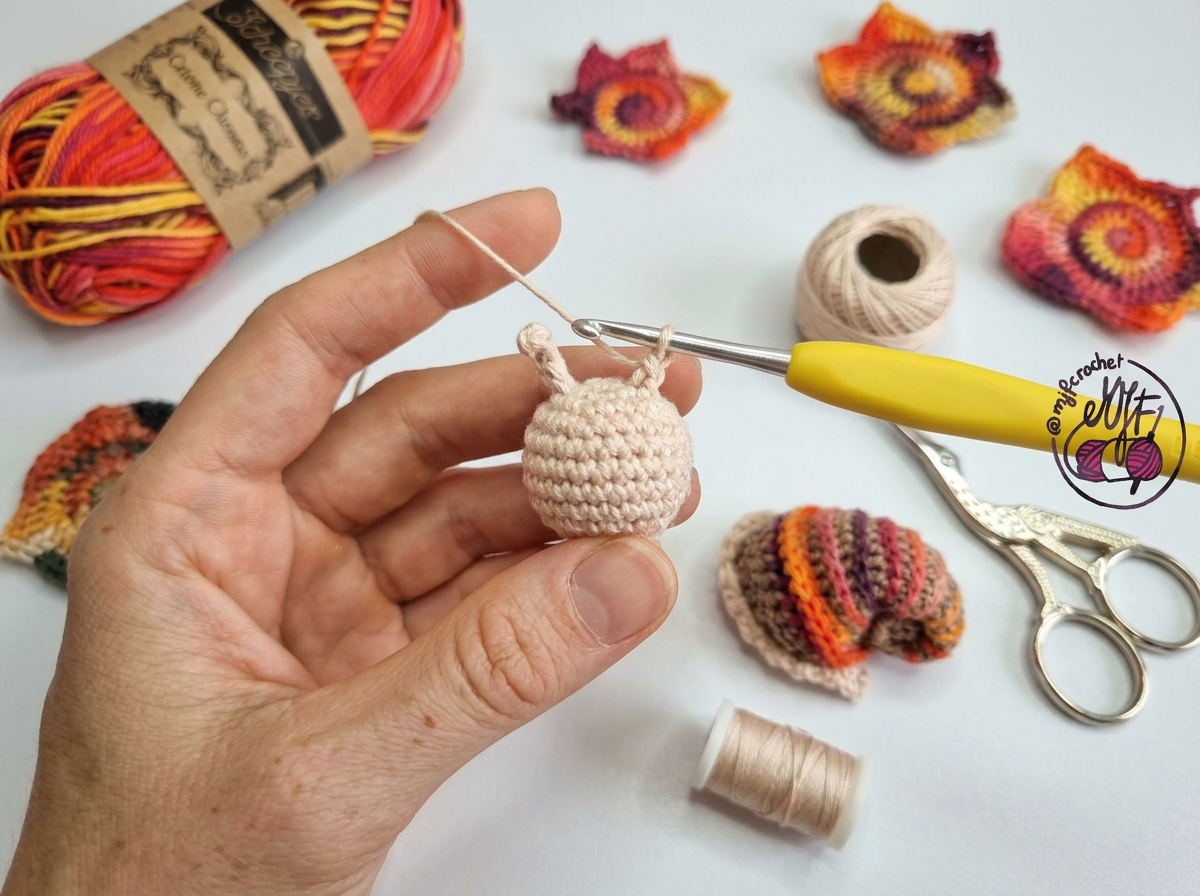
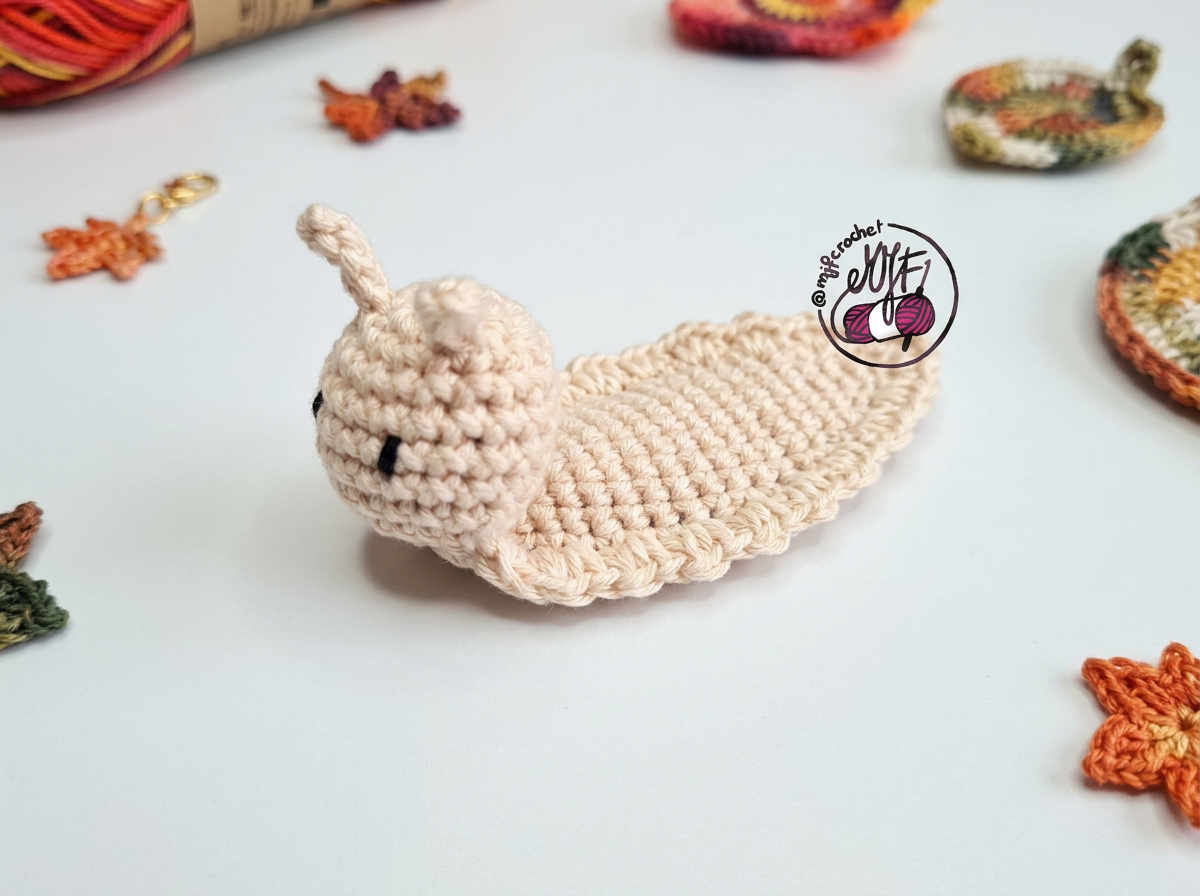
Using pale beige yarn, start the head. Rnd 1: 6 sc in a magic ring (6). Rnd 2: inc in each st (12). Rnd 3: [1 sc, inc] x 6 (18). Rnds 4-6: sc in each st around (18). Rnd 7: [1 sc, dec] x 6 (12). Stuff the head firmly. For the antennae, ch 4, sl st in the 2nd ch from hook and next 2 chs, sl st back into the head, repeat for the second antenna.
Step 4: Finishing the Body and Foot
From the neck (12 sts), flatten the remaining piece and work in rows to create the elongated foot. Rows 1-10: ch 1, sc across (6 sts), turn. Row 11: To create the ruffled edge, work [sc, ch 2, sc] in each stitch around the perimeter of the flat foot. Fasten off. Using black embroidery floss, stitch two simple lines for the eyes on the front of the head.
Step 5: Attaching the Shell
Position the finished, coiled shell onto the back of the beige snail body, resting it just behind the neck on top of the flat foot. Thread a tapestry needle with beige yarn and sew securely through the bottom of the shell and into the top of the body/foot, ensuring it sits upright and is firmly attached.
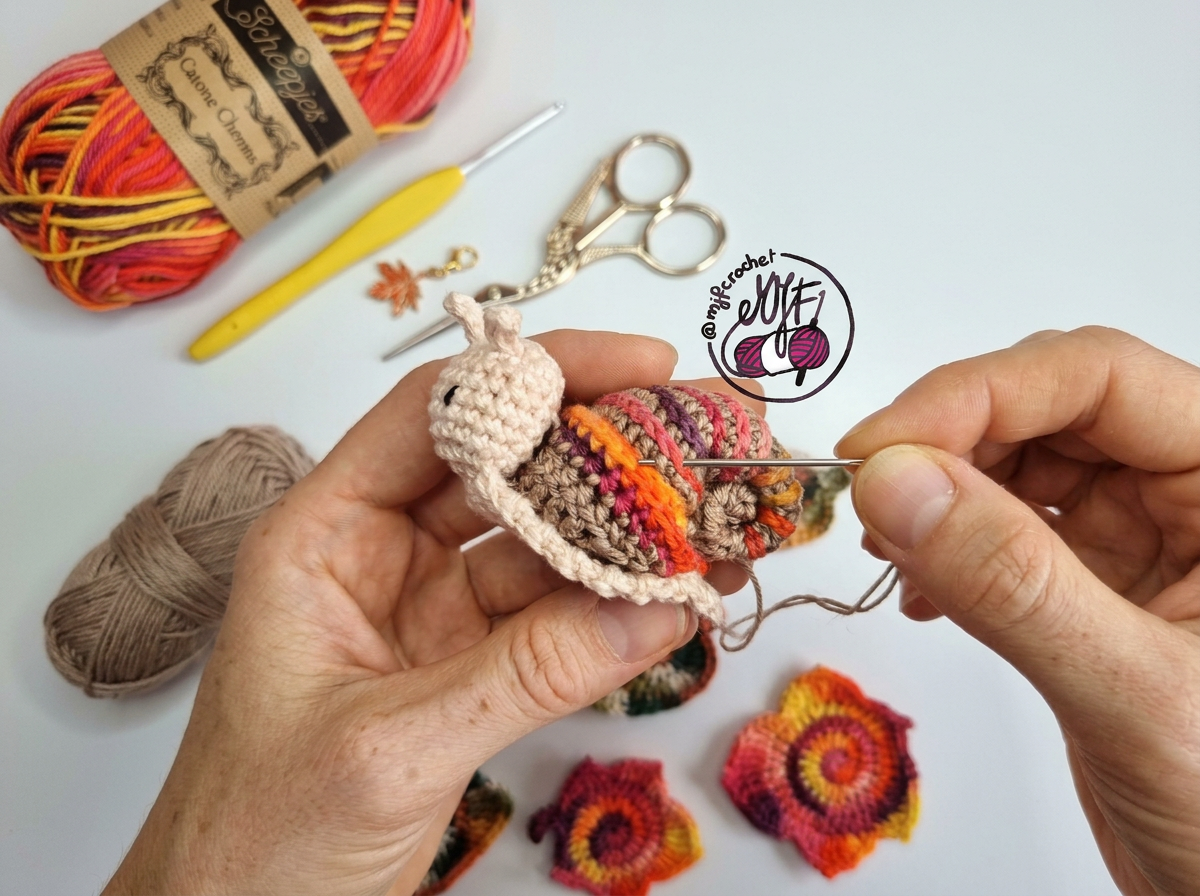
Congratulations on finishing your very own Autumn Snail Amigurumi! Isn’t the final result just delightful? The combination of the smooth, pale beige body and the highly textured, colorful shell really makes this little woodland creature pop. You’ve successfully navigated creating a tubular shell, mastering surface slip stitch ridges, and assembling a wonderfully structured piece of seasonal decor.
Now that your snail is complete, it’s time to find the perfect spot for it to live! This amigurumi looks absolutely stunning nestled among a scatter of decorative crocheted autumn leaves, placed on a cozy mantelpiece, or sitting cheerfully on your desk to keep you company during the workday. If you’re feeling adventurous, you can easily customize this pattern by experimenting with different shell colors. Imagine a spring version with pastel pinks and greens, or a magical galaxy snail with deep blues and sparkling purples!
If you need any extra visual help with the shell coiling technique or assembling the ruffled foot, be sure to watch the companion video tutorial. Seeing the steps in motion can be incredibly helpful for perfecting those finishing touches and getting your snail to sit perfectly upright. Don’t forget to share your finished projects with us! Tag your photos on social media so we can admire your beautiful autumn creations. Happy crocheting, and enjoy the cozy season!